3 Ways To Become An All-Grain Brewer!

Brewing Using One Ot The All Grain Brewing MethodsIf you’re new to all-grain brewing, you may have heard about infusion mashing, step mashing, and decoction mashing techniques and wondered what all the fuss is about. Don’t let the jargon confuse you. These are just 3 all grain brewing methods you can use to mash your malted grains to extract fermentable sugar. (If you’re not ready for brewing all-grain yet, you may want to check out our Introduction to Partial Mash Brewing.)

Let’s see if we can shed some light on the three mashing processes:

Single Step Infusion Mash

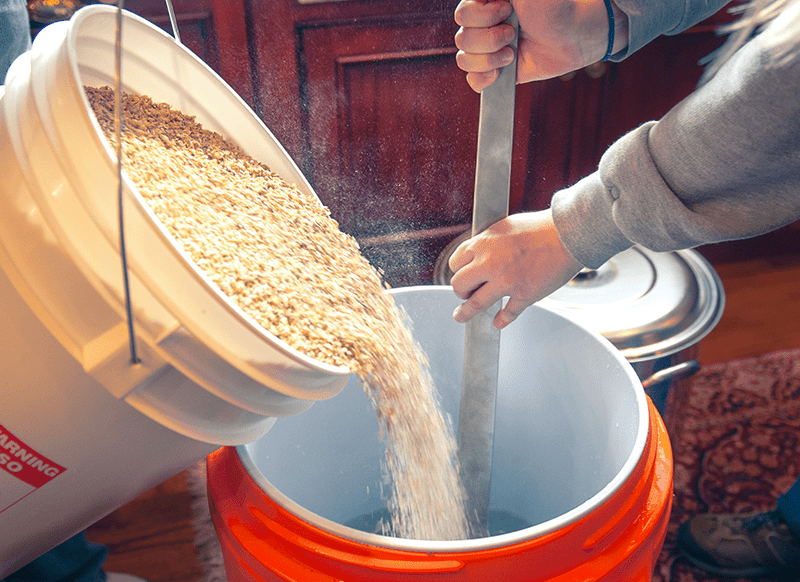
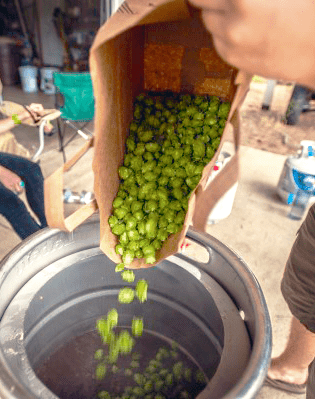
A single step mash is the most basic style of all grain mashing. It simply involves soaking the crushed grains in water at a steady temperature for a specified period of time. Most homebrewers mash for about 60 minutes, though in theory 30 minutes should do the trick.

This process, called conversion, allows naturally occurring enzymes in the grains to break down the starches into fermentable sugar. One of the cool things about mashing is that by controlling the temperature of the mash, you can change the fermentability of the wort. By mashing in the lower end of the temperature range (around 148°-152°F), you achieve a more fermentable wort, and ultimately a drier beer. Mashing your grains in the upper end of the spectrum (152°-158°F) creates a less fermentable wort and a sweeter beer. Since I don’t have a very advanced brewing system, I’m usually happy just keep the mash in the 150°-154°F ballpark.

Brewers have the option of raising the mash at the end for the mash out. Bringing the mash up to about 170°F will stop enzymatic activity and make it easier to run off the wort.

Multiple Step Infusion Mash

Shop Brew Kettels
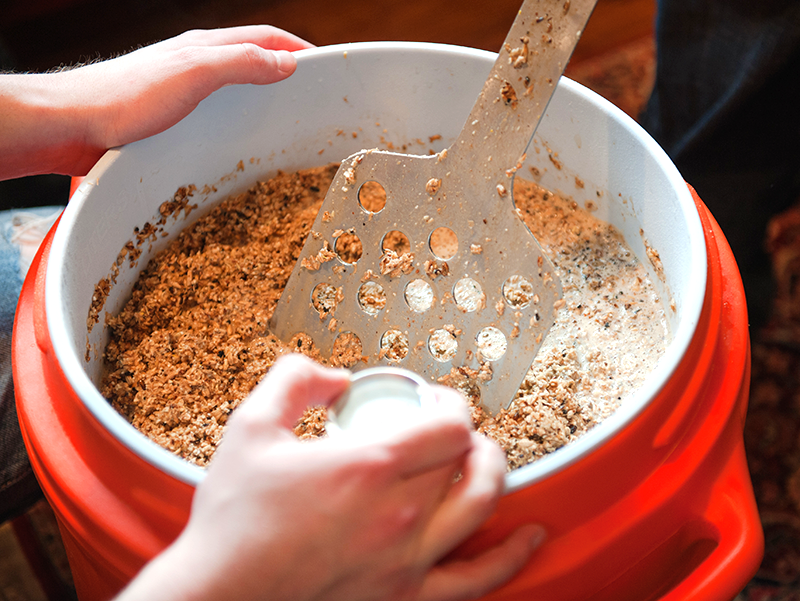
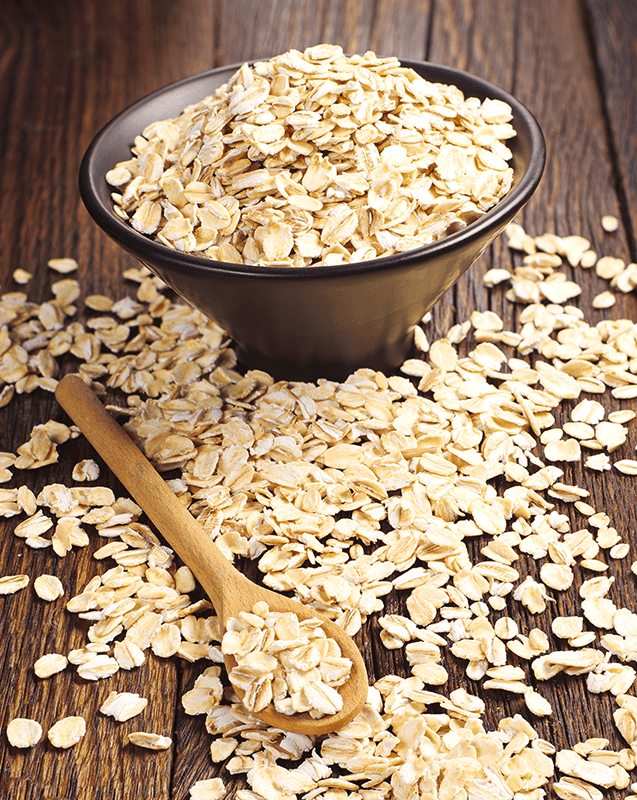
This all grain brewing method is often used when brewers need to break down proteins in the malt. This is only necessary when using under-modified lager malts. Because under-modified haven’t germinated as much during the malting process, a protein rest is used to allow enzymes to break down proteins in the grain. In a protein rest, the mash is usually held at around 122°F for 15-30 minutes, and then the mash is raised to conversion temperature (the temperature at which starches are broken down into fermentable sugars). The protein rest generally improves head retention and reduces haze when brewing with under-modified malts and unmalted adjunct grains.

Once again, brewers may want to raise temperature for mash out at the end of the multiple step mash.

Decoction Mash

Of the 3 all grain brewing methods mentioned here, decoction mashing is the most traditional brewing technique. It was developed by brewers who had a lack of temperature control. Brewers would remove a portion of the mash, boil it, and add it back into the mash. They might repeat this up to three times. These brewers found that the decoction process allowed them to bring the mash through each of the various rests and end up with a fermentable wort.Shop All Grain System

Today, since we have thermometers and other methods of temperature control, decoction mashing isn’t really necessary, though some brewing still use decoction mashing for brewing certain traditional styles.

So there you have it: Ales use single step mashing, lagers use multiple steps, and decoction mashing is an option for brewing certain traditional styles.

Which of these all grain brewing methods do you prefer?

First Wort Hopping: A Cooler Way Of Adding Hops To Your Brew

Pour Hops Into WortWhile it’s most common to boil the hops or “dry hop” by adding them to fermenter, there’s another technique of adding hop aromas to your brew called First Wort Hopping. Hops are many homebrewers’ favorite ingredient. Aromas of citrus, pine, resin are unique, pleasing at first smell, and somewhat addictive. Once you get the hophead bug, it’s hard to turn back! Some brewers claim the first wort hopping provides a better overall hop profile than the typical bittering, flavor, and aroma additions.

Let’s investigate what first wort hopping is all about:

What is First Wort Hopping?

First wort hopping is a technique which involves pouring the runnings from a mash over hops. This is usually done by taking some or all of the finishing hops and adding them to the kettle as hot wort runs into it.

Some brewers claim that first wort hopping (FWH) improves the aromatic hops qualities in the finished beer. Marty Nachel points out that “In fact, one study among professional brewers determined that the use of FWH resulted in a more refined hop aroma, a more uniform bitterness (i.e. no harsh tones), and a more harmonious beer overall compared to an identical beer produced without FWH.”

But how does first wort hopping work?

According to John Palmer, “The aromatic oils are normally insoluble and tend to evaporate to a large degree during the boil. By letting the hops steep in the wort prior to the boil, the oils have more time to oxidize to more soluble compounds and a greater percentage are retained during the boil.”

In other words, the pre-boil steep helps to keep aromatic oils in the wort. Palmer recommends using only low alpha-acid hops for first wort hopping and at least 30% of the recipe’s hops for this addition.

As Bradley Smith of BeerSmith points out, there’s a lot of debate surrounding first wort hopping and its effect on beer. The best thing to do is try it out and decide whether or not it works for you.

First Wort Hopping Tips for HomebrewersShop Accurate Scales

  • Since most homebrew recipes only call for 2-4 oz. it may require a digital scale to weigh out the 30% or so of hops used for first wort hopping.
  • Use low alpha-acid hops, such as the noble hops for first wort hopping. These usually have a best aromatic qualities.
  • First wort hopping is mostly a technique for all-grain brewers, but that shouldn’t keep extract or partial mash brewers from giving it a shot. Either make a “hop tea” while heating water for adding extracts, or steep the hops at the same time as steeping specialty grains. It’s an experiment, so take notes on the results and decide for yourself whether the technique works or not.

Have you used first wort hopping in your homebrews? How did it turn out? Share in the comments below!

—–
David Ackley is a beer writer, brewer, and self-described “craft beer crusader.” He holds a General Certificate in Brewing from the Institute of Brewing and Distilling.

Beer Recipe of the Week: Newcastle Brown Ale Clone

New Castle Brown AleConsidered by some to be the quintessential northern English brown ale, Newcastle was at one time the best-selling bottled beer in the UK. The beer, now ubiquitous throughout the US, was originally brewed in 1927 at Newcastle Upon Tyne. It’s a reddish-brown ale that highlights nutty malt flavor.

Though Newcastle is now brewed by the macro-brew powerhouse Heineken, many craft beer drinkers remember it fondly as a “gateway beer” to other traditional beer styles from around the world. Brew this Newcastle clone beer recipe and rediscover your love for brown ales!

Newcastle Brown Ale: Ingredients and Procedures

  • Malt – The key component in this brown ale is the crystal malt. The mid-range crystal 60°L malt is responsible for the nutty flavor in the beer. Small amounts of chocolate and black malt contribute color and a hint of dryness.
  • Hops – The classic English hop, East Kent Goldings, is used mostly for bitterness. Some hop flavor should be detectable, but will not overpower the malt.
  • Yeast – English ale yeast for this style of beer is essential. In the traditional brewing of this beer, the brewers would actually brew two separate beers, one high-gravity and one low-gravity. The high gravity beer would encourage the yeast to produce more fruity esters, which can then be blended down by the lower gravity beer. This is a lot of extra work for the homebrewer and is completely optional. It’s not impossible to do, but you’ll need an extra fermenter. It will be easiest if you’re using the all-grain method, taking the first runnings for a high-gravity boil, and the second runnings for the low-gravity boil. Then ferment the beers separately and blend them together at bottling time. (Again, this is completely optional.)

The beer recipe below is modified from the American Homebrewers Association. It was original printed in Zymurgy Magazine.

Newcastle Brown Ale Clone Beer RecipeShop Dried Malt Extract
(5-gallon batch, extract with specialty grains)

Specs
OG: 1.049
FG: 1.012
ABV: 4.8%
IBUs: 26
SRM: 15

Ingredients
5.5 lbs. light dry malt extract
12 oz. Crisp 60L crystal malt
4 oz. torrified wheat
1.5 oz. black malt
1.5 oz. Crisp chocolate maltShop Hops
1 oz. Kent Goldings hops at :90
1 oz. Kent Goldings hops at :30
1 tsp. Irish moss at :15
Fermentis Safale S-04: English Ale Yeast
corn sugar for priming

Directions
Heat about 3 gallons of clean, chlorine-free water to 150˚F. Place crushed grains in a grain bag and steep for 30 minutes. Discard grains and bring wort to a boil. Remove from heat, and stir in the malt extract. Return to a boil, taking care to avoid a boilover. Boil for 90 minutes, adding hops and Irish moss according to schedule above. At the end of the boil, chill wort to 70˚F or boil. Add enough cool, chlorine-free water to make five gallons of wort. Mix well with a sanitized spoon to aerate, then pitch yeast. Ferment at 65-70˚F. When fermentation in complete, bottle with priming sugar and cap. Beer will be ready to drink in 2-3 weeks.

Do you have a Newcastle brown ale clone beer recipe you’d like to share? Just leave it in the comments below.

—–
David Ackley is a beer writer, brewer, and self-described “craft beer crusader.” He holds a General Certificate in Brewing from the Institute of Brewing and Distilling.

Home Brewing With Oats

Oats for Home BrewngLike barley, wheat, and rye, oats are a cereal grain that can be used in home brewing. It would be difficult to make a desirable beer from 100% oats, but nonetheless oats often find their way into a number of beer styles, especially the oatmeal stout. They can be used to add smooth, silky body and oat flavor to just about any beer style. Oats help with head retention, but may contribute a bit of cloudiness. Here’s more information on home brewing with oats…

Oats are found in a number of Belgian and farmhouse styles, namely saisons and witbiers (as in the Brewcraft Belgian Witbier Recipe Kit).

When home brewing with oats you will find that they are typically found in one of three forms: raw, flaked, or malted. As you might have guessed, raw oats are unprocessed. They have to be cooked prior to mashing in order to extract any fermentable sugar from the grain. Flaked oats are the most common form of oats used in brewing. They are gelatinized as they are pressed through heated rollers, allowing brewers to extract their fermentable sugars by adding them directly to the mash. Malted oats are malted in much the same way that barley is, but they are not very common.

It should be noted that oats are technically gluten-free, so they could possibly be used to make gluten-free beer, perhaps in combination with sorghum, rice, or corn. The only hitch is that oats are often processed on shared equipment with wheat. If making a beer for someone with a severe gluten allergy, only use oats that are certified gluten-free.

Home Brewing Your Own Oatmeal Stout…

If you’ve never try home brewing with oats before, one could place to start is with an oatmeal stout. Oatmeal stouts became popular in England, so it stands to reason to use English ingredients when crafting our recipe. Start with two cans of Munton’s Light Malt Extract.

Next, we’ll derive color and flavor from some specialty malts. Try between 4 and 12 ounces each of Roasted Barley, Chocolate Malt, and Caramel 80L. Extract brewers can steep the grains, all-grain brewers can added them directly to the mash, or partial mash brewers can do a mini-mash with an equal amount of base malt. Add 4 to 16 oz. of flaked oats, or up to 10% of the total grain bill. You’ll find when home brewing with oats that this about the typical amount called for.Shop Home Brew Starter Kit

For the hops, we’ll want to use an English variety. Fuggles would be a good choice. The BJCP calls for 25-40 IBUs, so about 2 ounces of hops should do the trick. This beer should have little to no hop aroma or flavor, so add most (or all) of the hops at the beginning of the boil.

Finally, in the yeast department, English ale yeasts are the way to go and there are many good ones to choose from. Any of the following dry yeasts would give relatively clean flavors: Munton’s, Nottingham, Safale S-04. Wyeast 1084: Irish Ale will give more fruity esters, especially if fermented at warmer temperatures.

Have tips for home brewing with oats? Share in the comments!
—–
David Ackley is a beer writer, brewer, and self-described “craft beer crusader.” He holds a General Certificate in Brewing from the IBD.

Big, Hoppy, American Barleywine Recipe (All-Grain & Extract)

BarleywineJust how much flavor can you pack into a homebrew? I’m not sure if there’s a limit, but this barelywine beer recipe really pushes the envelope!

Barleywines are big, malty beers, usually featuring a complex range of flavors, from sweet caramel and toffee, to raisins, dates, and molasses. To balance out the malty sweetness, they’re usually heavily hopped, but the level of hop flavor and aroma can range from subtle to quite aggressive. Alcohol content is high, so these beers are often aged for months or even years to round out the flavors.

At 96 IBUs, this barleywine beer recipe is for hop heads. Three of the “C” hops – Centennial, Cascade, and Chinook – are added throughout the boil and as dry hops to give this beer a piney, citrusy hop character – think of Sierra Nevada’s Bigfoot.

Since this is such a high gravity beer (OG = 1.112), we recommend a few things to ensure a healthy fermentation:

  • Pitch a yeast starter – Pitching enough healthy, viable yeast cells is critical. At the very least, pitch two packs of liquid beer yeast into a 2L starter. Use a yeast starter calculator to determine exactly what size starter you need.
  • Use yeast nutrientYeast nutrient can give yeast an added boost for high-gravity beers. Nutrient is added during the boil, but have some yeast energizer on hand in the event of a stuck fermentation.
  • Oxygenate – if you have the equipment to oxygenate your wort, by all means use it. Otherwise, be sure to aerate the wort very well. Splash it around more than usual when pouring into the fermenter. Maybe even pour it through a strainer to maximize aeration.

Ready to brew this mammoth beer? Good luck!

Neural Rust Barleywine Beer Recipe
(5-gallon batch, all-grain)

Specs
OG: 1.112
FG: 1.023
ABV: 11.7%
IBUs: 96
SRM: 19Shop Dried Malt Extract

Ingredients 
17.4 lbs. Pale Ale malt
1.1 lb. Carapils malt
1 lb. Caramel 60L malt
0.6 lb. Caramel 90L malt
0.4 lb. Caramel 120L malt
1.25 tsp. gypsum (added to mash)
1.2 oz. Chinook hops at :60 (13.2 AAUs)
1 oz. Chinook hops at :45 (11AAUs)
0.85 oz. Centennial hops at :30 (7.4 AAUs)
0.6 oz. Cascade hops at :15 (3 AAUs)
0.6 oz. Centennial hops at :15 (5.2 AAUs)Shop Liquid Malt Extract
1 tsp. Irish moss at :15
2 tsp. yeast nutrient at: :15
2 packs Wyeast 1056: American Ale Yeast
1 oz. Chinook hops, dry-hopped for 14 days
1 oz. Centennial hops, dry-hopped for 14 days
1 oz. Cascade hops, dry-hopped for 14 days


Barleywine Beer Recipe Directions: 
Mash crushed grains at in 5.25 gallons water at 150˚F for 90 minutes. Lauter and sparge to collect seven gallons of wort. Boil for 90 minutes, adding hops, Irish moss, and, yeast nutrient according to schedule above. Chill wort, aerate well, and transfer to a clean, sanitized fermenter. Ferment at 68˚F for one month. Transfer to secondary and dry hop for two weeks. Bottle or force carbonate to target 2.3 vols. CO2.

Partial Mash Option:
Replace the Maris Otter malt with 2.4 lbs. Maris Otter plus 10 lbs. light DME. If possible, do a 7-gallon boil. If not, add half of the DME before the boil, the other half at the end of the boil, and increase the first hop addition to 2.4 oz.

Any barleywine can be fun to brew, but this barleywine beer recipe is particularly fun to make. And if you are not into the all-grain scene, the partial mash option fills out the flavor quite well.

—–
David Ackley is a writer, brewer, and craft beer marketing consultant. He holds a General Certificate in Brewing from the Institute of Brewing and Distilling.oz

Hops, Malt and Zen: How I Learned to Relax, Not Worry and Enjoy Homebrewing

Zen HomebrewingToday we have a guest post from beer blogger Bryan Roth, who explains why sometimes it’s nice to just sit back, relax, and let the beer brew itself.
—–
Technically, homebrewing is a science. But you’re not defusing an atom bomb – it’s just beer.

While I spent time on my early batches worrying about the intricate details of IBUs and grain bill percentages, I eventually let all that melt away. I’m a homebrewer. It’s fun. We should treat it that way!

No matter how you achieve the end product, the journey that gets you to a cold, frothy brew in a glass should be an enjoyable one. So let’s put away our refractometers, cool our jets in an ice bath, and reflect on the fun meaning of homebrewing.

Here are five lessons I learned to make sure homebrewing is always fun and stress-free:

Beer is flexible
A common adage among homebrewers is how forgiving beer can be. Compared to baking a cake or cooking soup, where small recipe changes can completely change the final product, a few extra ounces of malt isn’t going to make or break your brew.

There is some room for error with homebrewing, especially with styles like stouts or even a hopped-up IPA. It’s amazing what a little yeast, CO2 and alcohol can do to fix a mistake like a fly nose-diving into cooled wort (my SMaSH IPA last summer).

Brew time = play time
I homebrew outside on a small concrete slab in my backyard next to my wife’s garden. Being in close proximity to herbs and flowers constantly makes me second-guess recipe outlines I use for my brews. Half the fun of homebrewing is being able to experiment.

Don’t be afraid to grab something from home or your own garden and think how it could improve your next brew. Last-minute decisions to toss in some rosemary in an IPA I made this spring gave it some extra piney notes and lavender in a saison offered an incredible herbal aroma that paired with fruity Belgian esters.

Don’t sweat the small stuff…
There are just two aspects of homebrewing I pledge complete allegiance to: temperature and sanitation. As far as I’m concerned, there’s no need to get caught up in the nitty-gritty.

Some homebrewers may find good fun in having complete oversight of quality control and the brewing process, but for others, pH levels or water quality are something that may never cross your mind. That’s OK.

… but a little preparation goes a long way
A lot can seem to go wrong on brew day, but I’ve found it’s nearly always my anxiety making me worry. No need to be a helicopter parent to your brewing baby, especially when it’s easy to have an “emergency kit” of supplies just in case.

Instead of making extra trips to your homebrew store, keep some emergency items around the house. I always store two clean-fermenting Safale US-05 dry yeast packets in my fridge as a precaution and love having some extra muslin bags and Star-San sitting around.

Most important – don’t forget to always keep at least one chilled beer at the ready for brew day!

“Relax. Don’t worry. Have a homebrew.”
There’s a reason Charlie Papazian is considered the godfather of modern homebrewing, and that little gem of a quote is part of it. I always think of it as I’m sitting in my backyard with the wort boiling and my cares fading away.

Brew days can be long and tiring, especially when worrying about hitting efficiencies and getting temperatures just right. It’s easy to forget in the middle of mashing in just how exciting it will be to take the first sip of the beer you’re making. It never hurts to reflect on how pleasant an afternoon can be brewing with friends or even by yourself. Even if you think you screwed something up, all will be fine in the end.

From the beginner to the award-winning homebrewer, it’s important for all of us to remember what a great experience homebrewing can be and the people we’ll meet because of it. It’s a hobby that becomes more fun the more comfortable you are with it.

Next time you strain water from your malt or add your hops, keep in mind it’s OK to give yourself leeway. Relax, don’t worry, have a homebrew. Chances are you’ll still get tasty beer in the end.
—–
Bryan Roth is a beer nerd and homebrewer living in Durham, North Carolina. You can read his thoughts on beer and the beer industry on his blog, This Is Why I’m Drunk, and send him suggestions on how to get his wife to drink craft beer via Twitter at @bryandroth.

Calculating and Improving Mash Efficiency

Improving Mash EfficiencyIf you’re a homebrewer, you may have heard about mash efficiency in the brewhouse. But what is it and why does it matter?

Mash efficiency is a measurement of the percent of available sugars obtained through the mashing process. Brewing malt contains a certain amount of complex sugars, and the percentage which are extracted in a mash give us the mash efficiency. By improving mash efficiency, one can use less malt and save a little money, but the real value for the homebrewer is the ability to accurately predict the amount of malt needed when formulating a beer recipe.

Calculating Mash Efficiency

Later we’ll get into improving mash efficiency, but for now, here is one method for calculating mash efficiency, by using the gravity measurement of points per gallon (PPG):

Suppose that we use 10 pounds of two-row malt in a mash, and that this malt has a gravity rating of 1.037, or 37 points. After the mash and the sparge, we end up with 5 gallons of wort. If we were to extract all of the sugars from that malt (achieving 100% efficiency), the resulting wort would have a total of 370 points (37 points * 10 pounds). Divide by 5 gallons, and the resulting pre-boil gravity would have 74 points per gallon, or a gravity of 1.074.

But even the most efficient mashing processes can’t extract all of the sugars from the malt. The typical mash efficiency of a homebrewer will be in the ballpark of 60-80%, though this number can vary quite a bit depending on the brew, the type of homebrewing equipment being used, and number of other factors.

Continuing with the example above, suppose that the actual measured gravity of the wort when taken by a hydrometer is 1.050. We simply divide the measured gravity by the potential gravity to calculate the mash efficiency:

50 / 74 = 67.6%

Shop Barley CrusherThe challenging part of calculating mash efficiency is that we tend to brew with multiple types of malts, often with different extract ratings. As a result, calculations become a little more complicated.

Suppose we mash the following grain bill and end up with 5 gallons of wort:

Our total extract potential is:

[(37 * 8) + (33 * 2) + (34 * 1)] / 5 = 79.2

If our measured pre-boil gravity is 1.060, then our mash efficiency is calculated in this way: 60 / 79.2 = 75.8%

That’s actually a pretty good efficiency!

Improving mash efficiency

Beginning all-grain brewers may find that their mash efficiency is in the 50-60% range. With consistent note-taking, mash efficiency can be improved in the following ways:

  • Better grain crushShop All Grain System – If grain isn’t crushed enough, it will be difficult to extract the sugars from the grain. On the other hand, if the grain is crushed to much, the brewer risks a stuck sparge. It’s important to set the grain mill to get an appropriate crush.
  • Improved mash procedures (appropriate pH, temperature, water-to-grain ratio, length of mash)
  • Appropriate water chemistry
  • Improved sprage techniques – A slower sparge (30-60 minutes) will rinse more sugars from the mash than a fast one. Sparging with too much water will decrease your mash efficiency.

All of the above are effective ways to improve your mash efficiency. Get a handle on them and you’ll get more sugar from your grains.

Do you calculate the extract efficiency when you homebrew? Has your mash efficiency been improving?
—–
David Ackley is a beer writer, brewer, and self-described “craft beer crusader.” He holds a General Certificate in Brewing from the Institute of Brewing and Distilling.

10 Tips For Homebrew Cleaning And Sanitizing

Cleaning and sanitizing homebrew bottlesMany homebrewers will tell you that the first step to making good homebrew is to practice good cleaning and sanitizing habits. Without practicing good cleanliness, you run the risk of contamination by wild yeast and bacteria that could potentially ruin your batch of beer. While there are no known pathogens that can survive in beer, you certainly don’t want to throw a batch of homebrew down the drain because of spoilage!

But don’t worry! Cleaning and sanitation are easy to master. Before too long, it will become second nature, so invest some time and energy early in your homebrewing career to develop good habits.

Here are some homebrew cleaning and sanitizing tips to help you make sure your beer is clean, enjoyable, and free of contamination:

  1. Don’t rush through these important first steps! As tempting as it is to save time on brew or bottle day, cleaning and sanitation can make the difference between a great batch and one that gets thrown out. Also remember, it’s called cleaning and sanitation for a reason – it’s a two-step process. It’s important to clean away visible debris using a brewery specific cleaner, such as One Step Cleanser or Basic A. Follow package instructions to ensure effective sanitation.
  1. Making the most of ordinary household cleaning products may save you some money, but it’s important to know which products are transferable to the brewing world and which are not. Sanitizing homebrew equipment with unscented household bleach as an alternative sanitizer is a very effective, but it doesn’t take much – Charlie Papazian recommends using 1-2 ounces of regular, non-concentrated bleach per gallon of cold water, and soaking for about 30 minutes and allowing to dry. The biggest problem with using bleach to sanitize you equipment and bottles is that it does not rinse well. It likes to cling to surfaces. If you do use bleach, rinse thoroughly 3 times with hot water. NOTE: Do not mix bleach with other cleaners.Buy Basic A
  1. Do not use ordinary dish soap or detergent on your brewing equipment, as these can leave residues that will ruin your beer’s head retention. A good alternative is to us Five Star: Powdered Brewery Wash.
  1. Save a buck – and water – by reusing cleaning and sanitizing water when possible.
  1. Save more cash by filling a spray bottle with diluted sanitizer to spray down buckets and equipment. This uses less water than a soak, just make sure homebrew equipment gets enough contact time to ensure effective sanitation.
  1. Use non-abrasive scrubbers and brushes on plastic buckets and equipment. Scratches in the plastic are ideal hiding places for bacteria and wild yeast.

Tips for Homebrew Cleaning and Sanitizing on Bottling Day

  1. Be sure to remove the spigot from your bottling bucket before and after use and clean it well on the inside. By doing so you’re reducing the likelihood that significant “crud” will build up.
  1. If reusing beer bottles from the store or other homebrews, cleaning is much easier if you rinse well after drinking. This may seem like an obvious tip, but it can easily save a lot of time on bottling day!
  1. AShop Bottle Washer typical dishwashing machine set to the sanitize cycle can be used for sanitizing beer bottles. Make sure they are thoroughly rinsed BEFORE loading them up. A bottle washer can be attached to a standard kitchen faucet to make this process easier.
  1. Don’t forget to sanitize your bottle caps! Use the same method as you would for sanitizing other equipment.

As you brew more batches over time, you’re likely to develop your own homebrew cleaning and sanitizing tips and trick. What advice do you have for maintaining sanitation in the home brewery?

—–
David Ackley is a beer writer, brewer, and self-described “craft beer crusader.” He holds a General Certificate in Brewing from the Institute of Brewing and Distilling.

3 Homebrews to Serve at Your Holiday Feast

Homebrew Holiday Beer In Front Of FireplaceHomebrewing is without a doubt a culinary activity. Chances are that if you’re a homebrewer, you also enjoy cooking and experimenting in the kitchen. One of my favorite things about homebrewing is translating seasonal flavors from the kitchen into seasonal beer recipes. In the winter, many spices from holiday cooking make it into the brew kettle: ginger, cinnamon, cardamom. Pumpkin and cranberry are classic elements of a holiday meal, and what would the season be without peppermint?

All of these holiday flavors can be incorporated into beer recipes. Below, find three of my favorite holiday beer recipes. Brew each one for a three-course homebrew tasting event!

Cranberry “Lambic”

This beer resembles the wild-fermented lambics of Belgium, often made with fruit. But instead of waiting for years for the wild microbes to develop the characteristic sourness, this recipe uses cranberry juice concentrate in the secondary fermenter! Serve this homebrew as an aperitif or see how it plays along with the cranberry relish! Cranberry Lambic Recipe >>

Pumpkin Porter

This heartier brew can easily accompany some of the heavier dishes at the holiday meal. Canned pumpkin, sweet roasted malts, and variety of holiday spices combine in a wonderfully sweet, roasty, and spicy brew. Be sure to save room for dessert! Pumpkin Porter Recipe >>

Peppermint Stout

And for a final holiday treat, consider this chocolaty-smooth stout recipe recipe featuring notes of peppermint. Feeling adventurous? Try adding a candy cane at the very end of the boil!

Specs 
OG: 1.057
FG: 1.014
ABV: 5.6%
IBUs: 36
SRM: 34

Ingredients 
3 lbs. Dark DME
3 lbs. Dark DME (late addition)
Shop Steam Freak Kits1 lb. Munich malt
0.75 lb. Chocolate wheat malt
0.25 lb. Roasted barley
0.5 oz. Northern Brewer hops at :60
1 oz. Northern Brewer hops at :30
0.5 oz. Northern Brewer hops at :10
5 grams dried peppermint at flame out
1 packet Safale S-04 

Directions: Steep crushed grains in one gallon of water at 150˚F for 30 minutes. Strain wort into brew kettle. Add half the DME and enough water to make 3.5 gallons. Bring wort to a boil and boil for one hour, adding hops according to the schedule above. At the end of the boil, remove kettle from heat, mix in the DME and the peppermint, and chill wort. Transfer wort to a clean, sanitized fermenter and add enough clean, chlorine-free water to make 5.5 gallons. Pitch yeast and ferment at 68˚F.

What are some of your favorite holiday beer recipes? 
—–
David Ackley is a writer, brewer, and craft beer marketing consultant. He holds a General Certificate in Brewing from the Institute of Brewing and Distilling and is founder of the Local Beer Blog.

How To Tell Your Significant Other You Want To Be A Brewer

wanting-to-brew-beerCan’t figure out how to share your homebrewing passion with your significant other? Guest beer blogger Heather Erickson shares some tips:
—–
As a single, 30-something year old girl, the mention of my future goal of wanting to someday be a beer brewer sends all potential soul mates into a frenzy. They are intrigued. They are enthralled. In fact, I think a lot of the time, this fact about me is what keeps them coming back for more. While I might not have an issue with breaking the news to a skeptical significant other, you might. Below are my tips on how to gently break it to your love that you want to brew beer:

  1. Include them in your passion.
    My dating adventures over the past half decade have exposed me to a lot of fun activities, things I would have never tried if my significant other at the time wasn’t passionate about it. I’ve tried fly fishing, mountain climbing, marathon running, and even cooking (yes, I said cooking). My advice? Take them to a brewery, engage them in a beer tasting, allow them to get to know what you love about beer. Invite them on a brewery tour, go shopping at a home brew shop, include them at your next brew day.  Maybe even pick up a homebrew equipment kit to try out together. Once they understand why you love brewing beer, they will be much more open to your future career path.
  1. Find something they like about beer.
    Shop Home Brew Starter KitI understand that I am somewhat of an anomaly: a girl that loves everything about beer maybe more than life itself. While I usually reach towards craft beer, I do admit that there is a time and a place for a pint of yellow fizz. Surprisingly, I have come across many men in my date-able range that haven’t known that much about beer, whether it was about the craft or just trying to figure out what they like to drink. The teacher in me has taken them on and tutored their palettes to explore everything that is beer. Through lots of drinking – er, I mean, “research” – most have found at least one beer that they liked to drink. Even my good friend who can’t stop drinking Cherry Coke has found beer that she enjoys. My advice? Take your +1 on a journey, a palette journey to be exact. Find out what they like and who knows, you might find some new beers you do too. Pick up the book North American Clone Brews to replicate the beer at home that they enjoyed the most.
  1. Be patient.
    Now that your significant other knows about beer and why you like it, be patient. Any further prompting or pushing might just end up with them in the opposite direction. A huge misconception that I have come across is that the fact that I want to be a beer brewer means that I will be drunk all the time. Completely not the case. Drinking? Yes. Out of control drunk? Not at all. My example on this one is how my patience has paid off with my mom.Shop Steam Freak Kits Hearing that your only child, a girl at that, wants to dive into the world of beer brewing might have been a bit hard to take. Over the past three years, I have included Mom in all that is beer. From beer festivals to home brew shops, to even beer dinners, she has slowly become accustomed to my beer world. So much so, that for Mother’s Day, she made sure to pick a place for us to eat that would have a sufficient tap list for me. How’s that for acceptance? My advice? Include your honey in everything. Allow them to be a part of your dreams. They don’t have to love beer as much as you do. Over time, they will grow to accept your passion.

Beer brewing. While some consider it a work of art, others consider it a scientific process. Regardless of how you see it, be sure to include your partner in everything you do. The best cheerleaders to have in your corner are the ones that you love.
—–
Heather Erickson is a homebrewer with five years experience and has competed in the GABF Pro-Am Competition.