7 MORE Random Wine Making Facts

Sharing Wine Making FactsA few days ago we posted the blog, “7 Random Wine Making Facts…”. It had such a great response I decided to put some more wine making facts into a post.

These are trivial little pieces of information that randomly shoot off into different areas of wine and winemaking. Some of them you may already know, but do you know them all?

  1. A single packet of wine yeast multiplies itself many times over during a fermentation. That little 5 gram packet of wine yeast you put into your fermentation will typically regenerate itself by 100 to 200 times. Most of the growth happens during the first 3 to 5 days of fermentation. This is what it takes to have a vigorous fermentation.
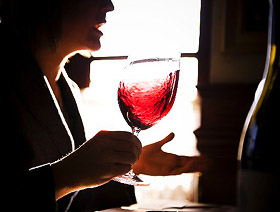
  1. All grape juice starts out clear. If you go out into the vineyard and lightly squeeze a wine grape of any color: red, blue, purple, black, green, yellow… you will get the same color grape juice, clear. Squeeze the same grape harder and roll it between your fingers, and you will notice that the juice coming from the grape is no longer clear. The color starts to release from the skin and join in with the grape juice. The color of the grape juice comes from the grape skin, not the grape juice itself.
  1. All wine contains vinegar. This wine making fact throws many for a loop, but no matter whose wine it is, who made it, or where you got or bought it, the wine has vinegar in it. This is because vinegar, also known as acetobacter, is a natural byproduct of a wine fermentation. The wine yeast actually produces low levels of vinegar while fermenting. Most wines have a level of vinegar on the order of .02% to .06%. Small indeed, but enough to contribute to the wine’s overall character in subtle ways.
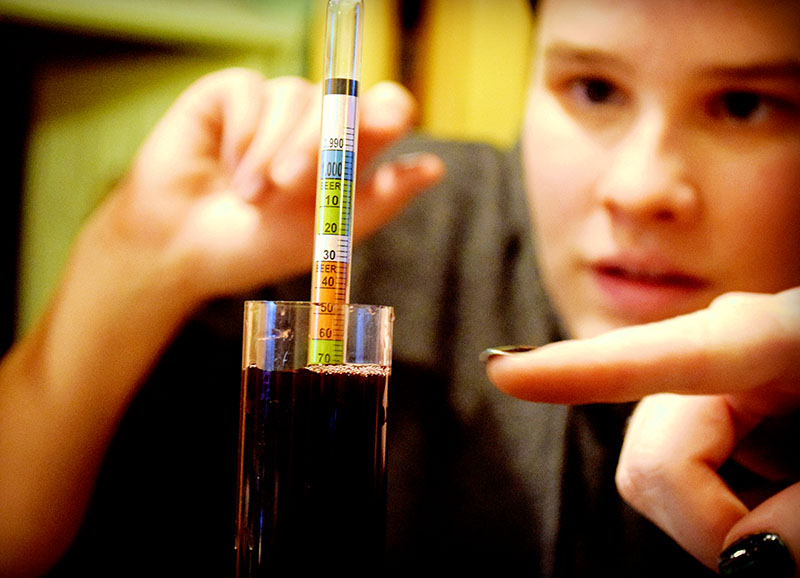
  1. Here’s a handy piece of math that may interest you. Take your wine hydrometer and get the starting Specific Gravity (S.G) minus the ending Specific Gravity (before and after fermentation), and times it by 131. This equals the alcohol in the wine. As an example, let’s say your wine hydrometer reading at the beginning of fermentation is 1.100, and your ending hydrometer reading is 0.996. You take 1.100 minus 0.996. That equals 0.104. Times 0.104 by 131. That gives you an alcohol reading of 13.62%. Could be handy!
  1. One grape vine produces about a gallon of wine. This is a very general wine making fact, but gives you a good ballpark, rule-of-thumb to go by when thinking about planting some grape vines. Some variables that affect this amount are: the type of grapes planted, the climate, the soil, and how well you maintain the trellising and punning.
  1. Grape vines do not produce a full crop until their 4th year. This wine making fact relates to #5, above. When starting a vineyard, you need to plan ahead. The first two years will have no substantial harvest. During the third you will have enough grapes to do a test run of your wine making. It won’t be until your forth season that you will have a full-fledged, complete and usable harvest.
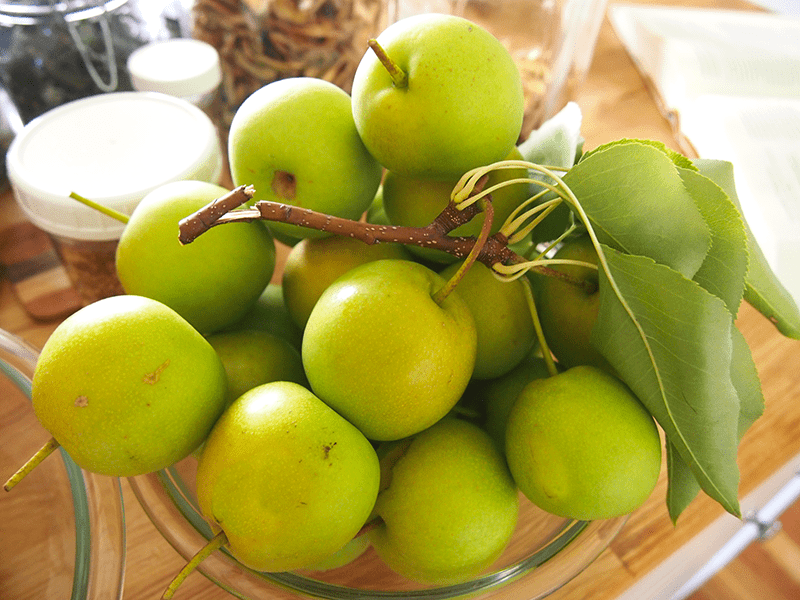
  1. You can freeze your wine making fruit. One problem with making garden fruit wine is getting enough of the fruit all at one time to make a complete batch. No worries. Just freeze the fruit until you do have enough. Freezing the fruit will help to break down its fiber. This makes it easier to extract the flavor into the wine.

There you have it, 7 ‘more’ random wine making facts. Can you think of any? We’d love to hear them and share them with other home winemakers. Just comment below and we’ll pass it along.
—–
Ed Kraus is a 3rd generation home brewer/winemaker and has been an owner of E. C. Kraus since 1999. He has been helping individuals make better wine and beer for over 25 years.

8 More Random Wine Making Tips And Tricks

Wine Pouring Into Glass With NotesYesterday, I posted 10 wine making tips and tricks. It received such a great response that I decided to post some more of them. These are quick, little tips that I have used over the years and have always been useful. I hope you find them useful as well…

  1. Try using glycerine in your air-locks instead of water. Glycerine does not evaporate like water, and it is perfectly safe if it accidentally gets drawn into your wine. In fact, any way already has some glycerine in it, naturally!
  1. Using a fermentation bag is a great way to keep pulp under control during a primary fermentation. Just pour your crush fruit into the bag and suspend it in the wine must during the primary fermentation. When it’s time to rack the wine, simply pull the bag out; allow to drain; and then discard pulp. This wine making tip is primarily for making fruit wine, but it will save you a lot of time.
  1. When Campden tablets are called for in a wine recipe, you can use sodium metabisulfite instead. Potassium metabisulfite has the same active ingredients as Campden tablets, but comes in a much-easier-to-manage, granulated form. You can also use our Campden tablet measurer which is a little spoon that measures out one Campden tablets worth of potassium metabisulfite at a time.
  1. IfBuy Oak Powder you’ve ever made wine from fresh elderberries, then you know that it can leave a sticky, gooey mess in your fermenter – one that is next to impossible to get out. This tacky mess seems to defy even the strongest cleaners available. Well, we have ran across a product that seems to be able to cut through this mess and take it right off. It’s called Goo Gone ™. It’s a citrus based cleaner that has the right mojo to take off the elderberry resin. You can find it in any full line grocery store, in the household cleaning section. I have no affiliation with this product or its manufacturer. I just think it’s great stuff.
  1. Sometimes it’s hard to tell just how clear your wine is when it’s still in bulk. Trying to determine if it is clear enough for bottling can be a difficult task. Heavier, darker wines often need to have a sample drawn off and put into a glass before you can really begin to determine anything. The same goes for any wine that is in a vessel which is not made of a clear material. One simple wine making tip that has worked well for me in the past, is to turn off all the lights in the room, and shine a strong flashlight through the side-wall of the vessel. What you are looking for is to see how clearly the beam of light illuminates through the wine. Some diffusing will occur with darker wines because of its color pigmentation. But, you do not want to see a murky or milky appearance to the light.
  1. The number one reason that a wine fails to clear up after fermentation is that it is still fermenting. A very slight fermentation can keep a lot of sediment stirred up. If your wine is not clearing, the first thing I recommend you do is check the wine with a hydrometer to see if residual sugar is the problem.
  1. Use our air-lock during the more active period of a secondary fermentation to keep up with the higher volumes of CO2 gas that is being released. As the fermentation slows down, switch to an S-shaped airlock like our triple ripple airlock, to help detect slighter amounts of fermentation. The triple ripple airlock is great for displaying even the slightest amount of activity.
  1. When making elderberry wine, plan on it tasting horrible when it’s first done. But, also plan on it tasting incredible once it has had time to age. Elderberry wine is very high in tannic acid which makes it taste very harsh in the beginning. But, it is this same tannic acid that also allows this wine to take extreme advantage of the aging process. The net result is a wine of stellar quality. All you need is the patience to let it sit for a year or so.Shop Airlocks

Bonus Wine Making Tip: Not sure what size cork, screw cap or plastic stopper you need for your odd-size jugs and bottles? Get a a sample pack of closures. It contains one sample of each of the various sizes and types of bottle closures that we carry. Each is clearly labeled for easy identification when you order.
—–
Ed Kraus is a 3rd generation home brewer/winemaker and has been an owner of E. C. Kraus since 1999. He has been helping individuals make better wine and beer for over 25 years.

How To Make Homemade Sparkling Wine

Glass of sparkling wine
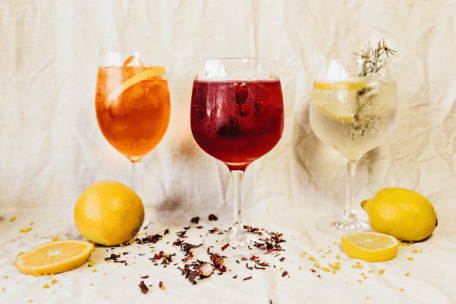
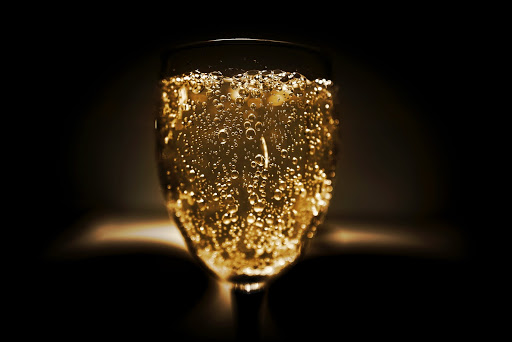
There are many different ways to make sparkling wine. There is the Methode Champenoise, the traditional French method believed to produce the highest-quality sparkling wine. The Charmat Method, a.k.a. the more affordable method, which utilizes a tank and creates wine like Prosecco. The Transfer Method, a combination of the Champenoise and Charmat methods. The Carbonation Method, which we do not recommend, and a few other methods you can read about here. Today we are going to focus on the Methode Champenoise, the traditional way to make Champagne in France. 

Sparkling wine can take up to nine months to finish, so if you’re hoping to have your own bubbly for the holidays you’ll want to start soon. 

Step One: Your Wine Base

Prepare your wine base. To make quality sparkling wine you’ll want to start with a tart but not acidic wine like Chardonnay or Chardonnay style wines. Ferment the base wine the normal way up until the stabilizing step. Do not add the stabilizing add-packs; the sulfites might kill your yeast. Rack your wine into a carboy and wait. When it’s done fermenting, your acid should be crisp and tart, and your wine clean and free of any off-odors.

Step Two: Riddling

To make sure your Champagne has that clear, crisp color, riddling takes place. Riddling is a labor-intensive process that inverts the sparkling wine and twists the bottle back and forth over and over again. This process loosens the sediment from the bottom and sides and collects in the neck of the bottle in preparation for disgorgement. 

Step Three: Disgorgement

Disgorgement is a crucial step in making sparkling wine. The goal is to eliminate the deposit of sediment in the neck of the bottle that occurred during the riddling process. First, prepare your topping wine and sugar, called the dosage, and chill. Next you’re going to put the inverted bottle into the freezer. You want the wine close to freezing, but do not freeze completely or the bottle will break in your freezer. When you see ice crystals form in the neck, your wine is ready to be degorged.

For the last step you’ll want an open space that is easy to clean. Gently remove the bottle cap so the pressure in the bottle forces the sediment out. Carefully top the wine off with the dosage and re-cork. We recommend using plastic sparkling wine stoppers. Cork stoppers can be expensive, difficult to insert and difficult to remove.

Step Four: Enjoy!

Store bottles in a cool, dry place, and be sure to chill each bottle thoroughly before serving!

Cheers!

3 Reasons Why Your Starting Hydrometer Reading Is Wrong

His Starting Hydrometer Reading Is WrongTaking a starting hydrometer reading is one of the most important things you can do when making homemade wine. This is a reading that is taken with a wine hydrometer before the fermentation has started. It is usually taken at the same time the yeast is added to the wine must.

Having an accurate starting hydrometer reading will not only help you verify that you have an acceptable level of sugar in the wine must, it will allow you to determine the finished wine’s alcohol content. This can be done when the starting reading is compared to the finished reading.

The reading is taken on the Specific Gravity scale. This is a scale based on the weight of water. The weight of the wine is being compared to the weight of water. The more sugar in the wine must the heavier it will be. The more sugar in the wine, the more alcohol the yeast can make.

Keeping in mind its importance, here are the 3 reasons why your starting hydrometer reading is wrong. These are scenarios that I have run across more than once while helping beginning winemakers. In each of these 3 situations the hydrometer reading can be thrown off dramatically.

  1. Shop HydrometersToo Much Water Was Added: This mostly applies to individuals that are making wine from a wine ingredient kit. These kits typically include around 2 to 4 gallons of concentrate to make 6 gallons. The idea is for the winemaker to add water to make up the difference of the 6 gallons. But on rare occasions a beginning winemaker will add a total 6 gallons of water by mistake giving them an 8, 9, 10… gallon batch of wine. This in turn will give them a very low starting sugar reading on their hydrometer.
  1. Sugars Are Not Mixing Evenly: Before taking a starting hydrometer reading it is important to have the sugars completely dissolved and evenly dispersed throughout the wine must. This is regardless if it is from a concentrate or granulated cane sugar. Not doing so can cause your hydrometer sample to be non-representative of the entire batch. The result is an erroneous reading. For example, if the sugars are not completely dissolved and still hanging towards the bottom of the fermenter, the reading you get from a sample take from the top will be very different from the reading you get when taking a sample through a spigot at the bottom of the fermenter.
  1. Hydrometer Jar Not Being Used: One of the requirements for taking a starting hydrometer reading, is the hydrometer needs to be able to float. If the container being used to hold the sample isn’t tall enough, the hydrometer will sit on the bottom. Again, this will give you a wrong reading. This normally happens when the winemaker is trying to use the plastic tube the hydrometer came in to take the reading. This is something I strongly urge against for the simple fact it is not always tall enough to float the hydrometer. Instead, you should be using a hydrometer jar that is designed specifically for this purpose. It is more than tall enough and has a sturdy base so you can keep the wine sample steady and vertical while taking the reading.

These are by far the 3 most common reasons. If you think you have a starting hydrometer reading that is wrong, it is probably because of one of these three. There are other reasons as to why a hydrometer reading might not be completely accurate, such as not having your eye-level even with the surface of the wine, but these are the 3 “big ones”. Avoid doing them and you’ll be sure to have dependable readings.

A Quick Tip For Racking Wine

Girl Racking WineFirst off, many of you may be wondering, “what does racking wine mean”? So let’s get that out of the way first. In terms of making wine, the definition of racking wine is the process of transferring a wine or must from one fermenter to the next so as to leave the sediment behind.

Racking wine is necessary because you do not want the wine to sit on excessive amounts of sediment over extended periods of time. Doing so, can cause your wine to develop off-flavors.

Many beginning winemakers will often lose too much wine during the racking process. This happens because they try to eliminate all the sediment with each racking at the expense of losing some wine. In other words, they leave behind too much wine because they feel it has too much sediment with it.

Shop Auto SiphonLosses can total up to 3 or 4 bottles in a 5 or 6 gallon batch when using this type of methodology. Losing wine is something I’m not particularly to fond of, and I doubt you are either.

Here’s the tip for racking wine: to minimize losses when racking wine, always try to get as much liquid as possible each time you rack, even if some sediment comes with it. It’s not about leaving all the sediment behind. It’s about leaving the bulk of the sediment behind. Get as much wine as you can. It’s not until you get to your very last racking – usually the racking right before bottling – that you will want to eliminate all of the sediment at the expense of a little wine.

By the time you get to this point in the wine making process, there is usually only a little dusting of sediment to deal with, anyway. So your wine loss will be very minimal – usually it will be less than half a bottle of wine.
—–
Ed Kraus is a 3rd generation home brewer/winemaker and has been an owner of E. C. Kraus since 1999. He has been helping individuals make better wine and beer for over 25 years.

To Use, Or Not To Use An Air Lock On A Wine Fermentation?

3 Airlocks In Silhouette
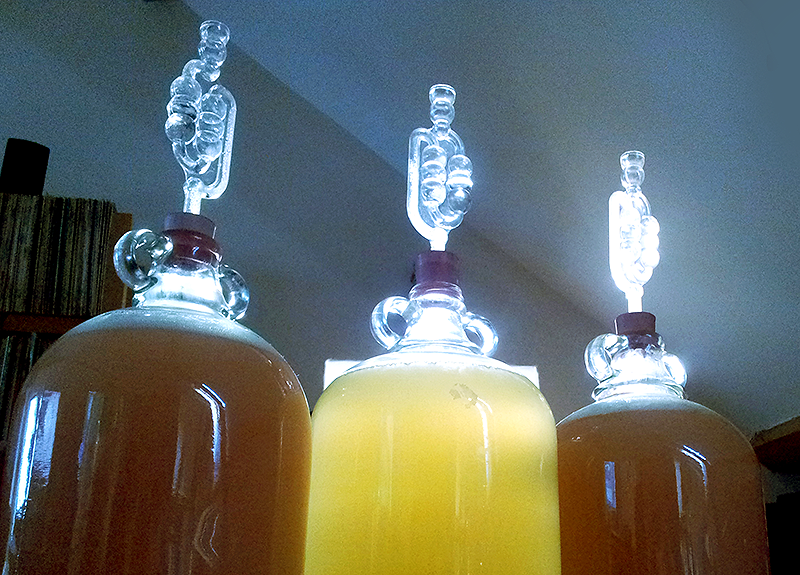
On many occasions we have been asked this simple question, “Should a wine making fermenter be sealed with an air-lock during the first few days of fermentation — the primary fermentation — or should it be left open, exposed to the air?”

The Conflict
This question arises because there is so much conflicting information floating around in wine making books, on the internet and in other places as to which method is correct. In fact, even our own wine making website recommends just covering the primary fermentation with a thin towel, while the instructions that come with the wine ingredient kits we sell recommend using an air-lock.

Even commercial wineries are not consistent in this area. While most wineries will put white wines under an air-lock and expose red wines to air, there are many, many wineries that will do the very opposite.

My Recommendation
The reason I recommend leaving the wine must exposed to air during the primary fermentation is because this method leads a more vigorous fermentation, one that is able to complete more thoroughly and quickly. Wine making kit producers recommend sealing up the primary fermentation with an air-lock because they are more concerned about eliminating any risk of spoilage than providing the fastest fermentation possible.

Spoilage can be of concern on those rare occasions when the fermentation does not start in a timely manner, but if the fermentation takes off quickly, spoilage is of no issue. The activity of the yeast will easily protect the must by impeding the growth of any unwanted organisms.

So, What Should You Do?
While I recommend using a thin, clean towel to cover the fermenter during the primary fermentation and nothing more, if you are concerned about your fermentation not starting there is a compromising method you could follow:

Buy AirlocksWhen you first pitch the wine yeast into the must, put an air-lock on the fermenter. After a few hours, once you see that the fermentation has begun–indicated by activity or foam on the surface–you can then take the air-lock off and safely allow air to get to the must. This is, in a sense, giving you the best of both worlds–the protection and an invigorated wine making fermentation.

As A Side Note:
It is important to note that an air-lock should always be used after the must has gone into its secondary fermentation. This is in agreement with most. This usually starts around the fifth or sixth day, or when the first racking is performed. It is about this time you will notice the fermentation’s activity level starting to taper off.
—————
Ed Kraus is a 3rd generation home brewer/winemaker and has been an owner of E. C. Kraus since 1999. He has been helping individuals make better wine and beer for over 25 years.

10 Random Wine Making Tips And Tricks

Learning Wine Making TipsHere is a collection of wine making tips and tricks for beginners and more-seasoned home winemakers. This is advice that has been published throughout our various newsletters over the years. They are just bits and pieces of information that have proven to be useful to home winemakers and help keep them from making mistakes.

  1. I’ll put the most important of wine making tips, first. Control your fermentation temperatures. The number one reason for a failed fermentation is temperature. The ideal temperatures for a healthy fermentation is between 70° and 75°F. If the fermentation is cooler than this, the wine yeast will start to go dormant and become inactive. If the fermentation becomes warmer than this, you will be increasing the ability of mold and bacteria to take over the wine.
  1. It is possible to temporarily cut back the amount of water called for in a wine recipe in order to accommodate a fermenter that’s not quite large enough. For example, if you have a wine making kit that makes 6 gallons, Shop Wine Kit Tips Bookbut your primary fermenter will only hold 6 gallons to the brim, you can cut back on the water called for by 1/2 gallon to allow for the foaming until it is time to transfer it to your secondary fermenter. At that time the shorted water can be added to the batch. The water should be distilled water when added at this point. The maximum amount I recommend shorting the water in a given batch is 1 gallon to every 5 or 6 gallons. This is assuming that the shortage will be promptly made up when the wine is transferred to a secondary container.
  1. Don’t have time to make wine when your fruits are ready? That’s okay. Just put your wine making fruits in the freezer. Fruits that have been frozen tend to break down more readily when fermented anyway. This will allow more of the fruits character to be release into your wine must. Of all the wine making tips, I particularly like this one the best. It has afforded me ability to have time to make more wine throughout the year.
  1. If you have ever picked elderberries before you know that it can be a very time consuming task. Not only are the number of berries required to make a batch of homemade wine quite high, the amount of stems that are involve are just as bad. You can categorize this one under time saving wine making tips… Shop Wine YeastWhen collecting the elderberries simply cut them off in clusters, stems and all. A tile knife works great for this. Put them all in a plastic trash bag or similar and freeze them for at least 2 days. Once the elderberry clusters have been frozen, inflate the trash bag with air, tie off its opening. Then violently shake or beat the bag against the ground. This will break most of the elderberries lose from the stems. Once this has been done sufficiently, clip a bottom corner of the plastic bag and the elderberries will come rolling out. You won’t get 100% of the berries out, so there will be some waste in the process. But, it is well worth the time that you will save.
  1. By storing your packets of fresh wine yeast in the refrigerator, you can double their shelf-life. Yeast stored in this way will always be good for at least two years after purchasing. If yeast is just stored at room temperature it is usually only good for about a year. It is important to note here that you never want to freeze yeast. Freezing yeast damages their cell walls making budding or reproducing very difficult during the fermentation.
  1. One easy way to warm up your fermenters during the cooler months is to use an old lamp with an old style 100 watt light bulb. If you place the bulb 12 inches off to the side of a 5 gallon batch, it will warm the liquid’s temperature by about 8 to 10 degrees. Wrap the vessel in a dark trash bag to protect the wine from the excessive light the bulb causes. If 8 or 10 degrees is too much of an increase, just back off the bulb another 1 or 2 inches away from your fermentation vessel. Use a stick-on thermometer on the opposite side the the fermenter to track the temperature.
  1. When taking a hydrometer reading, give the hydrometer a quick spin in the liquid to be tested, first. This is to dislodge any air bubbles that may be clinging to the side of the wine hydrometer. These bubbles can slightly throw off your reading.
  1. To increase the body of a finished wine without making it sweeter, add 2 to 4 ounces of glycerine to each 5 gallon batch. Glycerine is a natural byproduct of a fermentation. It increases the viscosity or mouth-feel of a wine. Heavier red wines such as Cabernet Sauvignon and Pinot Noir are known for their body. With these wines the fuller body helps their flavor to linger on the taste buds a bit longer while also helping to reduce the wines rough edges.
  1. Of all the wine making tips I’ve seen or heard of, I believe this one has saved more wine than any other: When doing your first one or two rackings, Shop Potassium Sorbatedon’t leave any wine behind – get it all. Even if it comes along with some of the sediment. With the earlier rackings all you need to be concerned about is getting rid of “most” of the sediment, not “all” of it. And particularly, not at the expense of loosing your precious wine. It is when you get down to the final racking, that it becomes important to leave all of the sediment behind – even at the expense of loosing a little wine. The last racking is the one that really counts. Heeding this wine making tip has saved me more wine than you’ll ever know.
  1. Instead of using cane sugar to sweeten your wines, try sweetening your wine with honey. Honey will enhance the complexity of the wine’s finish (aftertaste) and sweeten it at the same time. Remember to always add a wine stabilizer such as potassium sorbate when sweetening your wine with any type of sugar.

There you have it: 10 wine making tips to help your wine making efforts go a little smoother. I’ll go through the files and see if I can come up with any more. When I do, I’ll be sure to post them here.

—–
Ed Kraus is a 3rd generation home brewer/winemaker and has been an owner of E. C. Kraus since 1999. He has been helping individuals make better wine and beer for over 25 years.

photo credit: MTSOfan wine making 01 via photopin.com (license)

How to Make Homemade Pear Wine

Pears For Making WineI have tried several times making wine from pears and always end up with a wine that tastes like weak moonshine. It has a smooth taste but not much flavor. I had a friend make some homemade pear wine as well and his turned out the same way. We have come to the conclusion that there is probably sugar locked into the fruit that is being released during the fermentation. My question is do you think our conclusion is correct and if so how can I go about figuring how much sugar to add to the fermentation. I think these pears will make a very fine wine if I can just figure out the recipe.

Jeff L — PA
—–
Hello Jeff,

In general, pears do not have a lot of flavor relative to other fruits. Think of the raspberries used to make a raspberry wine. When you taste a raspberry you know it. They are bursting with flavor.

Pears on the other hand are not bursting with flavor. When you bite into a pear you can tell it’s a pear. You can taste its character, but it’s nothing explosive like a strawberry, blueberry or even peach. Put the pear flavor up against the tongue-numbing effects of alcohol – such as the situation of a homemade pear wine – and you have something that tastes just like you described, weak moonshine.

Here are some tips for making homemade pear wine at home. These are some ideas for getting more pear flavor into the wine when using fresh pears.

Tip #1 For Making Homemade Pear Wine
One trick I have found to work well when making pear wine is to let the pears get as ripe as possible. Let the pears get as soft as you can without letting them turn to rot. If some pears are turning quicker than others, you can put them in a bath of sulfite solution, whole, until the other pears are ready. This will stop the pears from rotting any further.

Allowing the pears to become as ripe as possible will go a long way towards getting you a homemade pear wine with more pear character. When pears are early they taste closer to an apple. As they develop, the flavor that makes a pear, a pear, starts to become more pronounced.

Shop Hydrometers

Tip #2 For Making Homemade Pear Wine
Don’t drive the alcohol level of your pear wine up too high. Try to keep it around 10% to 12%. This can be done with the aid of a hydrometer. Use the potential alcohol scale on the hydrometer. As you add more sugar, the wine must will rise on the potential alcohol scale. Having the alcohol too high will give the pear wine a watery impression. This is because the high alcohol level is numbing your tongue to the flavors that are actually there.

Tip #3 For Making Homemade Pear Wine
Going back directly to your question, if you are using chopped fresh pears for making wine, the sugars in the pears should be release during the fermentation. The enzymes produced by the wine yeast will break down the pear pulp, releasing the sugars and the flavors. If you are not using an actual wine yeast, the correct enzymes are not being produced to break the pear pulp down.

Use wine yeast only. For pear wine we recommend Lalvin EC-1118 wine yeast. In addition, also be sure to add pectic enzyme. This will help to break down the fruit fiber, as well. Pectic enzyme is important in helping to get more flavor from the fruit.

Try mashing up the pears a bit. Once they have been cubed, you can use something like a cleaned and sanitized 2 x 4 stud to crush them. You are not looking for apple sauce consistency. You just want the fiber structure of the pulp to be disrupted some. This will allow the enzymes to break down the fruit fiber more quickly. By getting to the fruit fiber more quickly, you are getting both more flavor and more sugar from the pears.

By employing these tips you will be able to make a better homemade pear wine, one that actually tastes like pear. If you are still not sure what to go from here, you may want to take a look our pear wine recipe. This recipe makes 5 gallons of pear wine. It’s an easy recipe, straight-forward recipe that should help you out.

Happy Winemaking,
Ed Kraus
—–
Ed Kraus is a 3rd generation home brewer/winemaker and has been an owner of E. C. Kraus since 1999. He has been helping individuals make better wine and beer for over 25 years.

Fruit Wines: The Perfect Gift for Mother’s Day

Did you know over 60% of wine consumers are women?

Fruity wine flavors

While we’re not entirely surprised, it’s a pretty staggering number. From wine tasting groups to girl’s night out, women are finding all kinds of reasons to

 indulge in this timeless drink. 

As winemakers continue to experiment with varietals, tannins and flavors, many have started to explore other fruit based mixtures. Fruit wine is wine made from fruit other than fermented grapes or grape juice.

This fun new wine makes a great Mother’s Day gift or an exciting kick off for warmer weather!

Choosing Your Fruit

Depending on the time of year, there are plenty of fruits to choose from when buying or making your wine. Fruit seasonality and their fermentation period should be considered when selecting your fruit.

Here’s a guide to help you pick the perfect fruit wine for Mom or yourself:

SPRING FRUITS

  • Strawberries: A sweeter wine – long fermentation period.
  • Cherries: Bold flavor that can be as sweet/sour as you like – long fermentation period

SUMMER FRUITS

  • Blackberries: Bold red wine that tastes great when blended with apples. 2 years to age.
  • Blueberries: Creates a light rose wine – short fermentation period.
  • Peaches: White wine with a great aroma – short fermentation period.
  • Plums: Rich color and flavor – short fermentation period.

FALL FRUITs

  • Apples: A light white wine. Great base for blending wines – 2 years to age alone.

Now that you’ve chosen your fruit, let’s start wine making!

How to Make Fruit Wines

Gifting this to Mom or that special woman in your life? Try making fruit wine from scratch.

Similar to making regular wine, there are many recipes for any skill level. We’ve got a great general recipe to get you started.

What You’ll Need:

Ingredients:

  • Fruit of your choice
  • Wine yeast
  • Sugar

Tools:

  • 2 glass containers – 1 for primary and secondary fermentation
  • Fermentation bag
  • Wine bottle

Optional Supplies:

  • Hydrometer
  • Tartaric
  • Citric/malic acids for better balance and quality

Instructions:

Step One:

  • Mix sugar, water, and your cut up fruit into a fermentation bag, cover it with a towel and let it sit for a day.

Step Two:

  • Add the yeast, and replace the towel covering it. Squish the bag once a day, and let this sit for another 5 days.

Step Three:

  • Drain all the liquid from the fruit and place into the carboy. Cap with an airlock for proper fermentation
    • You can use a siphon tube for more accuracy, but if you don’t have one it’s fine

Step Four:

  • Store this in a cool and dark place for another month before repeating the fermentation process.

Step Five:

  • Once all the bubbles are gone, you can pour the wine into your glass bottle and seal it with a cork!

Congrats! You’ve made your first bottle of fruit wine.

Whether you’re buying or making fruit wine, it’s sure to be a fun experience for all. And if you’re giving to Mom, or even creating with Mom, it’ll be a fun way to celebrate Mother’s Day.

Cheers!

How to Make Mulled Wine this Holiday Season

The holidays are here! mulled wine

That means cold weather, cozy nights, and non-stop festivities until the new year. If you’re looking for a recipe to show off and impress guests, we have the perfect wine for you.

Start the season by making a batch of mulled wine. It’ll warm your fingers, toes and the hearts of others – ‘tis the season after all.

What is Mulled Wine and How Do I Make It?

Historically, mulled wine has been used to repurpose harvest leftovers, warm the body during the cold months, and “heal” with its spices. The holiday drink we know and love today is really a product of Victorian England, with authors like Charles Dickens writing about mulled wine in “A Christmas Carol”. 

As a time-honored tradition, mulled wine will keep guests warm and satisfied throughout the holidays. It may sound complex, but it’s surprisingly easy to make, and a guaranteed crowd-pleasing cocktail. 

First things first. Make sure your pantry is stocked with these items: 

  • Your favorite wine – this is also a great time to show off your skills with your own handcrafted wine!
  • Mulling spices (details on these later)
  • A large pot or slow cooker 
  • Something to serve your drinks in
  • Optional: A snack pairing
  • Optional: Mulled wine pairs well with a partner – feel free to add extra booze. 
    • Spirits like brandy, cognac and gin will spice things up!

WARNING: Mull with caution 

  • Do NOT BOIL your mixture. This can spoil your drink. 
  • Whether you are buying or making your wine, make sure it’s not too heavily oaked to avoid bitterness.

What Type of Wine Should I Use?

As you’re getting your list together you may be wondering what type of wine is the best to use. Thankfully, almost any variety will do. The only catch is that some mulling spices pair better with certain wines than others. 

Tip: if you’re purchasing wine from a store, it’s perfectly fine (and encouraged) to use cheaper wines for mulling. More expensive, complex wines often lose their intricate notes in the mulling process.

What Spices Should I Use?

If you’ve taken a look at a few recipes, you’ve probably noticed some common spices:

  • Cinnamon
  • Oranges
  • Star Anise 
  • Honey 
  • Some sort of extra liquor

All of these are staples, but they are not set in stone. Have fun with your recipes and explore adding different fruits and spices to your wine. And if you’re short on time, some retailers sell premade mulling spice mixes like this one

Mulled Red Wine 

The classic mulled wine is a dry, red variety- Syrah, Merlot, Cabernet, pick your preference. You can make mulled red wine as simple or complicated as you’d like (though we prefer simple so you have time to prep other things). 

Spices:

  • Cinnamon
  • Cloves
  • Oranges
  • Honey
  • Star Anise

Here’s an easy mulled wine recipe to get you started!

Mulled White Wine 

While using white wine isn’t as common, some lean towards a lighter taste (think Viognier, Chardonnay or Pinot Grigio depending on the recipe). With this variation of mulled wine, winter fruits such as pomegranate, cranberries and oranges stand out in flavor and presentation.

Spices:

  • Cinnamon
  • Oranges
  • Honey
  • Star Anise
  • Lemons
  • Cranberries
  • Pomegranates 

For an extra kick, try spicing things up with this Apple Mulled White Wine recipe.

How to Serve Mulled Wine

You’ve made your very first batch of mulled wine. Congrats! Now, let’s find something to serve it in and with.

Mugs vs Glasses

Since mulled wine is mostly served warm, many opt for serving in mugs because they keep it warmer longer. However, if you’re focused on a nice presentation use glass mugs, double-wall glasses or special mulled wine glasses. Add a little flare by topping it off with a fresh piece of fruit used in your recipe, or a cinnamon stick. Going the extra mile here will make a lasting impression on your guests and elevate your drink.

Mulled Wine Pairings

Looking for the perfect dish or appetizer to serve with your impressive creation? Here are some ideas to pair with your mulled wine.

  • Cheese board 
    • If you are pairing with something sweet, consider Roquefort, Bleu Cheese, Gorgonzola, or Comté – they’ll bring out the cinnamon and clove notes!
  • Spiced nuts
  • Fondue 
  • Mince pies  – if you’re feeling fancy!

It’s official. You are now a mulled wine connoisseur! We hope you enjoy sipping your cocktail as you share your recipe with friends and family. 

Cheers!