Partial Mash Brewing: 5 Reasons To Love It!

Partial Mash BrewingSometimes partial mash brewing gets a bad rap. Some think that the only way to make good beer is by brewing all-grain. On the contrary, you can make good beer with malt extracts and some specialty grains. I can think of several examples of good beer made with malt extract, and if you’re a homebrewer, chances are you can too.
Having recently gotten back into partial mash brewing in my home brewery, I’d like to share a few of the reasons I’ve enjoyed going back to this simpler method of brewing:

  1. It’s how most of us got started with homebrewing. Maybe you’ve been brewing for a while. Remember partial mash? Remember those first few batches you did way back when, the ones that came out surprisingly good? Without the ease and simplicity of partial mash brewing kits, you may not be brewing today. Try getting back into partial mash brewing, and whatever you do, don’t discourage would-be homebrewers by giving partial mash a bad name.
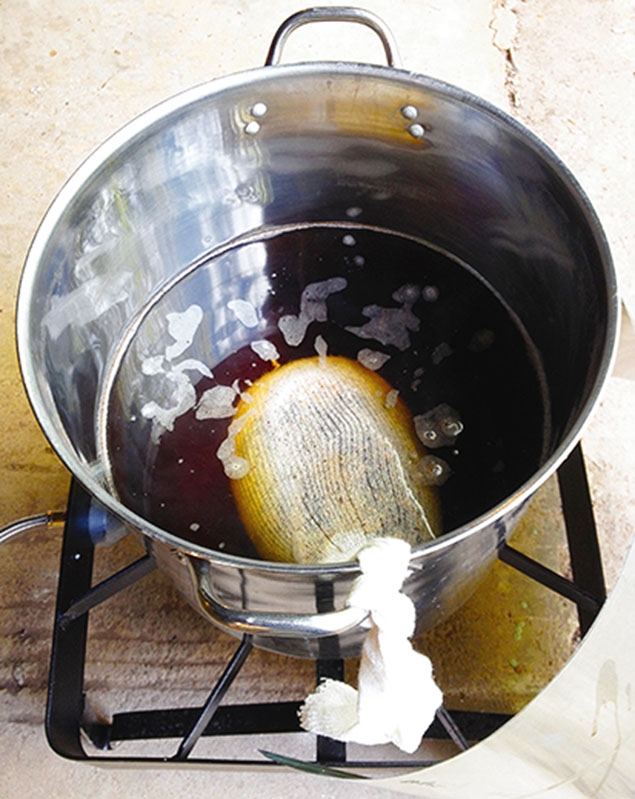
  1. Partial mash brewing takes less time. Partial mash brewing eliminates a couple key steps of the brewing process: the mash and the lauter. Combined, these steps can take well over an hour. Additionally, since a partial mash brew often has a smaller boil volume, it takes less time to bring the wort to a boil, and less time to chill it afterwards. Looking for other ways to save time while homebrewing? Check out these 8 Time-Saving Tips for Homebrewers.
  1. Shop Steam Freak Kits
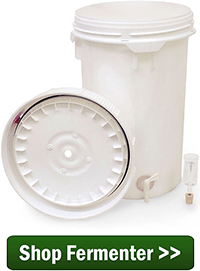
Partial mash brewing requires less effort. Because there’s less grain and less water, there’s less heavy lifting when doing partial mash recipes. Plus, with the easy availability of partial mash brewing kits, there’s no need to stress over building a beer recipe.
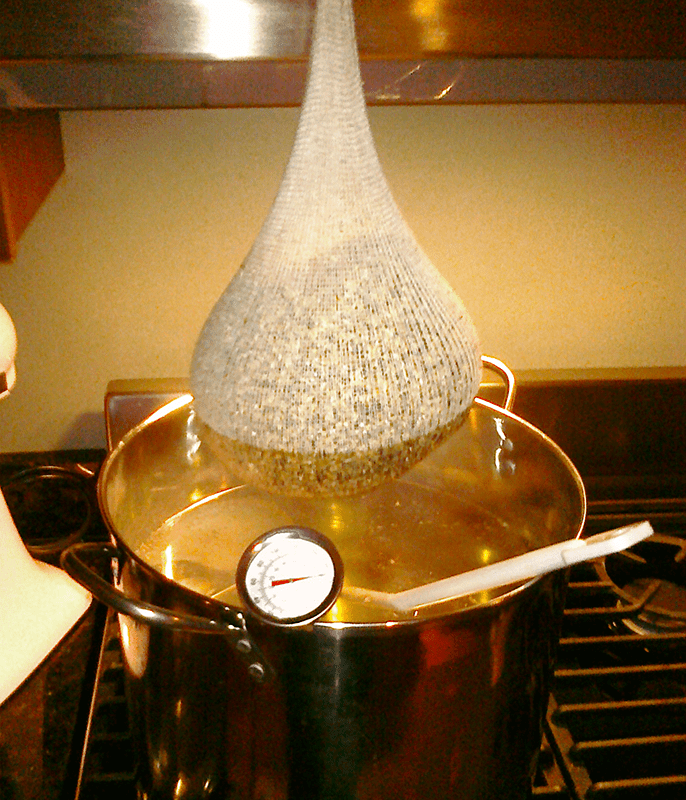
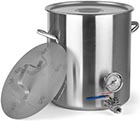
  1. Partial mash means easy cleanup. Partial mash brewing may only leave you with a pound of so of spent grains. It’s much easier to dispose of a pound than ten or more pounds of wet grain. Better yet, it’s a perfect amount of spent grains to put into spent grain bread or dog treats. Plus, if using a grain bag, you don’t have to clean out a mash tun.
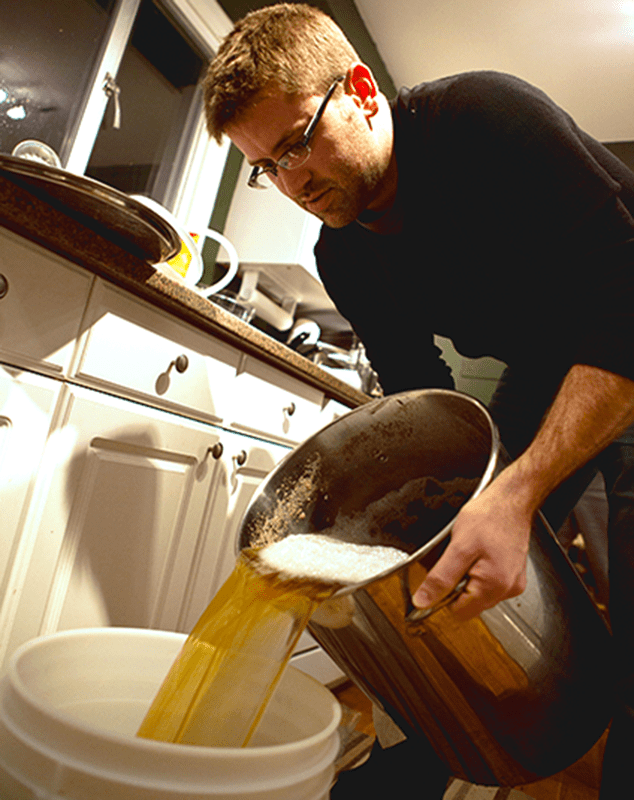
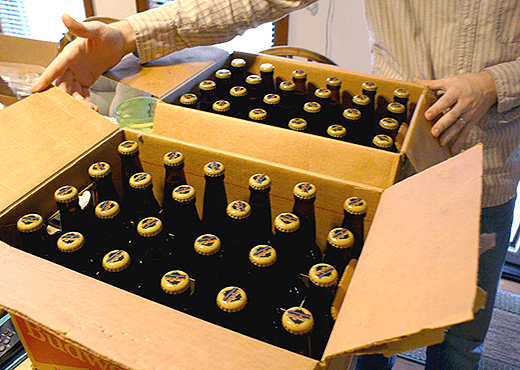
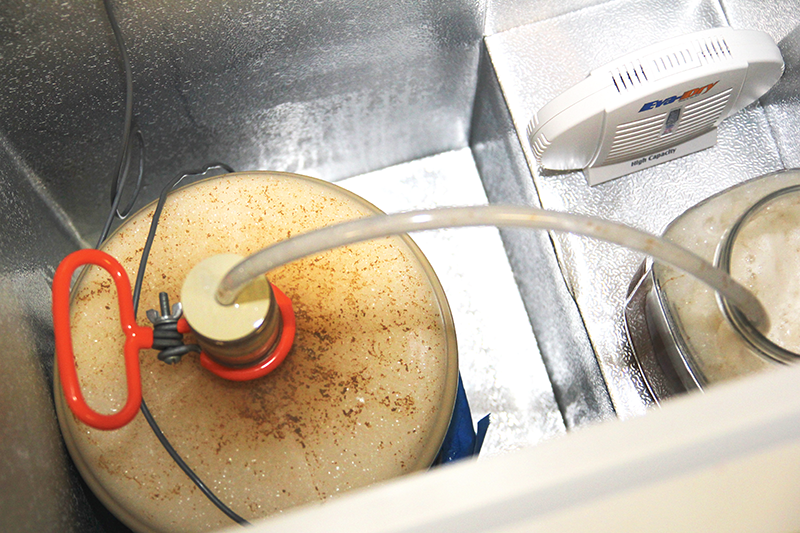
  1. You still end up with great beer! At the end of the day, a partial mash brewing kit still gives you five gallons of great beer. With a few tricks up your sleeve – stellar cleaning and sanitation, late extract additions, yeast starters, fermentation temperature control – you’ll be able to make great beer every time.Shop Home Brew Starter Kit

Partial mash brewing offers quite a few advantages over all-grain. If you’ve been brewing all-grain for a while, maybe it’s time to circle back and give partial mash another chance.
Do you brew partial mash vs all-grain? Why or why not? Share in the comments below!
—–
David Ackley is a beer writer, brewer, and self-described “craft beer crusader.” He holds a General Certificate in Brewing from the Institute of Brewing and Distilling and is founder and editor of the Local Beer Blog.

7 Skills For Becoming A Better Homebrewer

Person Becoming A Better HomebrewerWhat skills are needed for becoming a better homebrewer? Do you need to be the boldest out of your friends or have the biggest beard? I don’t think so.
Homebrewing is a hobby that (in addition to providing you with great beer!) offers an opportunity to develop a wide range of skills. Not only do these skills make you a better brewer, but they can be transferred to other hobbies and activities as well. So in a sense, becoming a better homebrewer is a path towards self-improvement.
Below you can learn about 7 key skills I’ve needed to master to help me become a better homebrewer:

  1. Attention to detail – Together, cleaning and sanitation comprise the critical first step in homebrewing. If you can’t keep your equipment clean or skip steps on the sanitation process, sooner-or-later you’ll get an infected homebrew and have to dump a batch. While you can avoid some of the more “science-y” aspects of homebrewing, don’t skimp on cleaning and sanitation.
  1. Resiliency – Homebrewing is not for people who give up easily. At times, you may encounter frustration. Just remember to breathe and keep in mind that you’re doing this for fun!
  1. Problem solving – Becoming a better homebrewer means being Shop Liquid Malt Extracta better problem solver. Occasionally, something will not go as planned with a batch of beer. Homebrewing tests your ability to break down a multi-step process to identify the source of a problem. Even when things go right, you will be tested to identify the nuances in process and ingredients that affect a beer’s color, flavor, aroma, and other characteristics.
  1. Creativity – Homebrewing is a great avenue for exploring your creative side. Just about any ingredient can be used when making beer. Want to brew some unusual concoctions? Try a chipotle smoked porter, oak barrel IPA, or a maple Scotch ale to flex your creative muscle.
  1. Consistency – This skill is essential for professional brewers, but it can be important for homebrewers as well. Anyone can brew one good batch of beer, but can you do it over and over? Take good homebrewing notes and test your consistency by perfecting some of your favorite beer recipes.
  1. Curiosity – Homebrewing offers an endless path for learning, whether it’s about yeast propagation, water chemistry, or calculating IBUs. If you’re inclined to dive deep into a hobby, then homebrewing is for you.Shop Home Brew Starter Kit
  1. Good attitude! – This one can’t be stressed enough. Above all, homebrewing should always be fun. That’s not to say it won’t be challenging at times. But sometimes becoming a better homebrewer requires that you remind yourself of the reasons you started homebrewing in the first place. If you ever need a refresher on how to keep your cool, check out Hops, Malt, and Zen: How I Learned to Relax, Not Worry, and Enjoy Homebrewing.

What skills would you add to the list for becoming a better homebrewer?
—–
David Ackley is a beer writer, brewer, and self-described “craft beer crusader.” He holds a General Certificate in Brewing from the Institute of Brewing and Distilling and is founder of the Local Beer Blog.

Brewing A Coffee Stout Beer Kit – Part Three

Bottled Homebrew Two CasesLast night I bottled the Steam Freak Captain Cogsworth Coffee Stout. This brew requires a somewhat unusual bottling process, so I’ll walk you through it. The objective: add the coffee and the priming sugar at the same time.
Luckily, both can be done without a major modification to the bottling process. Basically, instead of mixing the priming sugar with water, the instructions that came with this coffee stout beer kit call for mixing the priming sugar with coffee. I like to do things differently, so instead of making a regular cup of coffee, I decided to make cold brew.
Cold brewed coffee is simply ground coffee steeped in cold water. The idea is that this avoids extracting harsh, burnt flavors from the coffee. The only catch is that it takes longer to brew than traditional coffee brewing methods, about 24 hours instead of a few minutes. Here’s how I went about adding cold brewed coffee to my coffee stout:

  1. Shop Coffee StoutAbout 24 hours before bottling, pre-boil the steeping water. For the sake of sanitation and to remove any chlorine in the water, I boiled my steeping water for about 20 minutes. I placed the lid of a mason jar in the boiling water for several minutes to sanitize it.
  1. Pour the boiled water into a quart-size mason jar. I poured the water into the jar when it was still very hot, so this should have sanitized the jar.
  1. Cool the water in the refrigerator. I set the jar in the fridge for a few hours while I did some work around the house.
  1. Mix the ground coffee into the water. I poured off about half of the water and added the coffee to the jar. I sealed it up and mixed the coffee around a bit.
  1. The next day, get ready to bottle. One of the first things I do when bottling a beer kit is move the fermenter into position. This gives sediment a chance to settle while I clean and sanitized bottles, caps, the auto-siphon, tubing, and the bottle filler.
  1. Shop Bottle CappersMix coffee and priming sugar. First, I used a priming sugar calculator to find out how much priming sugar to use. Then I strained out the coffee using a sanitized French press. I poured the coffee into a small pot and mixed in the priming sugar, heating the mixture to just short of boiling.
  1. Transfer beer into bottling bucket and mix in priming sugar/coffee mixture. I gave the coffee/sugar mixture a moment to cool, then got ready to transfer. I started transferring the beer and poured in the coffee/sugar mixture once there was about an inch of beer in the bottling bucket. The swirling motion of the beer as it filled the bottling bucket was enough to mix things together.
  1. Bottle. Fill bottles and cap as usual!

Ideally, using the cold-brewing coffee method will bring a smooth, aromatic coffee character to beer, without adding much bitter astringency. Stay tuned to see how it this coffee stout beer kit turns out!
Interested in other coffee-flavored beer recipes? Try this Sierra Nevada/Ninkasi Double Latte Clone and check out these tips for brewing beer with coffee.Shop Fermenter
Part I – Brewing a Coffee Stout
Part II – Brew Day, Partial Mash
Part III – Adding Coffee, Priming
Part IV – Final Tasting Notes
———————————–
David Ackley is a beer writer, brewer, and self-described “craft beer crusader.” He holds a General Certificate in Brewing from the Institute of Brewing and Distilling and is founder of the Local Beer Blog.

Brewing A Coffee Stout Beer Kit – Part Two

Partial Mash BrewingThis weekend I brewed my latest homebrew recipe kit from E. C. Kraus: Captain Cogsworth Coffee Stout.
Though I often brew all-grain, I enjoy other methods of making beer. For example I like partial mash brewing for a number of reasons. For one, partial mash brewing takes less time. I can usually do a partial mash brew in about four hours, as apposed to six for all-grain, cleaning and sanitation steps included. Most of the time savings come from eliminating the mash and lauter steps. Bringing the wort to a boil is faster too, since you’re dealing with about half as much liquid. It’s also nice that after steeping the grains you only have to dispose of half a pound of grain, not twelve, and there’s no mash tun to clean out.
When I brew partial mash brewing kits, I will sometimes make small adjustments to the recipe in the box. For this coffee stout beer kit, I added a little extra base malt to the steeping grains for a more grainy malt flavor and a little diastatic power. The extra grains may contribute some extra body and mouthfeel as well.
The first step in partial mash brewing (after cleaning and sanitation, of course) was steeping the specialty grains. I used pure RO water from the store. After about 20 minutes at 150°F, it was time to bring the wort to a boil.Shop Steam Freak Kits
This is the point where malt extract is added to the wort. Regardless of whether brewing on the stove or on a gas burner, I always turn off the heat before adding the malt extract. This helps prevent a boil over. After adding the malt extract, the wort smelled glorious! A lot like hot cocoa.
After bringing the wort to a boil, I added the first round of hops, in the case of this Cogsworth coffee Stout, one ounce of Northern Brewer. Thirty minutes later, I added the rest of the hops: one ounce Tettnanger. With 15 minutes left in the one-hour boil, I added a couple additional ingredients that weren’t called for in the beer recipe with this kit: Irish moss and yeast nutrient. In my experience, these can help with clarity and fermentation, and I’ve simply gotten into the habit of adding them to every brew.
As with bringing wort to a boil, chilling a wort with the partial mash brewing method is much faster. I was able to chill the wort with my immersion wort chiller in basically half the time compared to doing a full wort boil. After that, all I did was pour about two gallons of water into my sanitized fermenter, pour the wort on top, top off to five gallons, and then stir to mix and aerate. Sometimes I will top off a little more than five gallons just to account for losses in trub.
Shop Wort ChillersSo far, the partial mash brewing directions that came with this brew kit have worked well. I took a quick hydrometer sample (1.059 – right on target!), pitched the yeast, and in a couple weeks I’ll be ready to add the coffee! Based on how the coffee smells…I’m excited!

Part I – Brewing a Coffee Stout
Part II – Brew Day, Partial Mash
Part III – Adding Coffee, Priming
Part IV – Final Tasting Notes
———————————–
David Ackley is a beer writer, brewer, and self-described “craft beer crusader.” He holds a General Certificate in Brewing from the Institute of Brewing and Distilling and is founder and editor of the Local Beer Blog.

How To Make Chicha: Corn Beer Recipe

Native Central AmericansWhat would you do if corn were the only grain you had available to brew with? You’d make corn beer with it!
That’s exactly what native cultures throughout Latin American have done for hundreds, maybe even thousands of years. Plenty of variations exist, but chicha is a corn-based beer traditionally made by chewing the corn to convert its starches to fermentable sugars, spitting it out, and fermenting the corn in water. Sometimes chica is consumed young, sweet, and low-alcohol, sometimes it is allowed to ferment to a higher alcohol content.
As Sam Calagione of Dogfish Head found out, making chicha this way is not easy. Luckily, modern day homebrewers have access to practically unlimited ingredients for making corn beer at home. Making a corn-based beer is as easy as mixing flaked corn with hot water, adding various flavoring ingredients, and fermenting as you normally would any other batch of homebrew.
The corn beer recipe below is a modern interpretation from one of my favorite homebrewing books, the Homebrewer’s Garden. It’s a one-gallon recipe, so be sure to have a one-gallon glass jug with a 6.5 rubber stopper and an airlock. You can easily scale up the recipe to a five-gallon batch, but you should probably try the one-gallon batch first to make sure you like it.

Chicha (Corn Beer) Recipe
(one-gallon recipe, adapted from the Homebrewer’s Garden)
Specs
OG: 1.048 – 1.060
FG: 1.010 – 1.013
ABV: 5 – 6.2%
IBUs: 0
SRM: 5

Ingredients
4 lbs. flaked corn (maize)Shop Beer Flavorings
1/4 lb. brown sugar
16 oz. homebrewed porter
2 bags Tension Tamer tea (or approx. 4 grams of cinnamon, ginger, and chamomile)
1 packet Munton & Fison ale yeast
1/4 cup corn sugar for priming

Directions
Mix the flaked corn with 1 gallon of boiling water. After one hour, strain the wort into a brewpot. Repeat in order to collect 1.5-1.75 gallons of wort. Bring wort to a boil and mix in the brown sugar and the porter. Boil gently for three hours, or until one gallon of wort remains. Add the tea to the wort at the end of the boil, then chill and transfer to a sanitized one-gallon jug. Ferment at 60-70˚F. Chicha is traditionally consumed after only 3-4 days. In this case, you may transfer the beer to a serving vessel (a growler, for example) and store in the fridge. Otherwise, ferment until complete and bottle condition as normal.
This chicha corn beer recipe is easy to make and can be altered with different spices or beer to match your personal tastes.
Interested in other ways to add corn to your homebrewed beer? Read: Brewing with Corn
———————————–
David Ackley is a beer writer, brewer, and self-described “craft beer crusader.” He holds a General Certificate in Brewing from the Institute of Brewing and Distilling and is founder and editor of the Local Beer Blog.

Homebrew FAQ: Top 5 Beginner Questions- Answered

Beer RoundtableSpend any amount of time on homebrewing forums, and you’re bound to see several of the same questions come up again and again. Don’t feel bad – it’s just part of the learning process. To simplify that process, I’ve compiled answers to the top 5 most common home brewing questions beginners have about home brewing. But remember, there’s more than one way to open a bottle of beer – ultimately, you will brew the way that makes the most sense for you.
So without further ado: 5 Most Common Home Brewing Questions – Answered!

  1. Is my beer infected?
    If you have to ask, then something may very well be amiss. But if it’s your first batch, don’t freak out just yet. Just follow the instructions that came with your beer recipe kit to the end, and then taste the beer. Does it taste good? If so, you’re in good shape. If not, something went wrong. It might be an infection, or it could be a number of other issues. Consult the BJCP Fault List to try to figure out what might have happened and consider doing some Off-Flavor Training to hone your palate so you can identify potential missteps. Even if you do discover a likely infection, use it as a learning experience – your next batch is bound to be that much better.
  1. Do I have to rehydrate dry yeast?
    Absolutely not. I’ve brewed many batches of beer just sprinkling the yeast over the wort. It works just fine, and it’s certainly easy. But is it the best way to pitch dry yeast? That’s up for debate. Many experts agree that yeast should be rehydrated in a small amount of water before pitching. Their reasoning is certainly sound, but when in doubt, follow the directions on the yeast packet or visit the manufacturer website for more information.
  1. How come I missed my starting gravity (SG)?
    For beginning homebrewers, a starting gravity that’s significantly off is due to one of these reasons:

    • Shop Homebrew BooksAdded water to fermenter without regards to gravity – Many homebrew recipe kits instruct the brewer to top off to five gallons, but if for some reason you didn’t get all the malt extract out of the can or lost some volume in the process, adding this much water may dilute your beer below the target starting gravity. For best results, take a gravity sample before diluting and use a dilution calculator to figure out exactly how much water to add in order to hit your target SG.
  1. It’s been two weeks – why aren’t my bottles carbonated?
    When bottling homebrew, carbonation occurs by giving the yeast a small amount of extra priming sugar to consume. After capping, the yeast will eat the sugar and produce CO2, but since the bottle is sealed the carbonation will have nowhere to go but into solution in the beer. In order for the yeast to do their job, they have to have ideal conditions, in particular, a temperature range that’s warm enough for them to work. This usually means about 70˚F. If the beer is stored in a cold basement or refrigerator during this phase, the yeast won’t carbonate the beer or may do so very slowly. Make sure the bottles are in a warm room and give them some more time. Only in rare cases will additional action need to be taken in order to carbonate your beer.
  1. Do I have to do a secondary fermentation?
    Absolutely not. Though secondary fermentation is often used as a way to improve beer clarity, many beers will turn out fine with just a primary fermentation of two to three weeks. Secondary fermentation is only required (I use that term loosely), when aging the beer for an extended amount of time (months). Check out The Pro & Cons of Secondary Fermentation for more reasons why, or why not, to do a two-stage fermentation.

There you have it – simple answers to some of the most common beginner home brewing questions.
What other home brewing questions belong on this list?
———————————–
David Ackley is a beer writer, brewer, and self-described “craft beer crusader.” He holds a General Certificate in Brewing from the Institute of Brewing and Distilling and is founder and editor of the Local Beer Blog.

Choosing the Perfect Yeast Strain for Your Homebrew – Pt. 1

Wyeast DisplayYeast: that magical micro-organism that turns sugar into alcohol and carbon dioxide. Simply brew up a batch of sweet wort, pitch the yeast, and in a few weeks you have beer!
But not all yeast is created equal. In fact, there are many different strains used for brewing beer, all with different characteristics that influence the flavor, aroma, body, and mouthfeel of your beer. How do you choose the perfect strain for your beer?
In this two-part post, I’ll first outline some of the considerations for picking a yeast strain, then I’ll share many of strengths and weaknesses of the top yeast varieties available to homebrewers.
We’ll start from a broad level, and then narrow down the options.

Yeast Selection: Dry vs. Liquid Yeast
Choosing between dry and liquid yeast is largely dependent on personal preference. Dry yeast is easy to work with and it stores well. Liquid yeast, while offering a great variety of strains to work with, is less stable and usually requires a yeast starter. For some, the extra work is worth it, but for many, dry yeast gets the job done just as well. For simplicity, I’d suggest that beginning brewers start with dry yeast, and then start experimenting with liquid yeast when they’re ready. From that point, you can make the best choice about whether to use liquid or dry yeast on a batch-by-batch basis.

Yeast Selection: Ales vs. Lagers
As far as rules go, this is where you pretty much have to stick to one or the other. Ales, which ferment warm, require top-fermenting ale yeast; lagers ferment cooler and require bottom-fermenting lager yeast. But even this rule can be bent on occasion. For example, the Brulosopher reports having good results brewing lagers with Kolsch yeast. This may be a good option if you’d like to brew a lager, but don’t have a temperature-controlled fermentation chamber. Otherwise, start by sticking to ale yeast for ales and lager yeast for lagers, at least until you get a few batches under your belt.

Yeast Selection: Picking the Right Strain
The perfect yeast selection for you beer will be largely dependent on the style you are making, but there is certainly some crossover. Some styles have more to do with the malt and the hops than the yeast, so a neutral-flavored yeast strain can work in a variety of situations. For example, German Kolsch yeast may be used to brew an American Blonde Ale. English yeast strains might be used to brew American beers, and vice-versa. Even when you purchase a homebrew ingredient kit, don’t feel like you have to stick with the yeast provided. For example, you may get an American Pale Ale kit, but want to try a Belgian strain – go for it! Hold on to the yeast you got with the kit and use it for your next brew.
The main consideration will be choosing a yeast strain based on specific qualities that you want in your beer. Among the most important areShop Beer Yeast Culturing :

  • Flavor, which often goes hand-in-hand with fermentation temperature. For example, a German hefeweizen is defined by banana and clove flavors produced by German weizen yeast, and the levels of banana or clove can be regulated by adjusting the fermentation temperature.
  • Attentuation, or the amount of sugars that will be fermented in the beer. A high attenuating strain will leave a beer with a dry finish. Conversely, a yeast with low attenuation will leave some fermentable sugar and more body. This said, be aware that attenuation can also be controlled with ingredient selection, mash temperature, and a number of other factors.
  • Flocculation, or the tendency of the yeast to clump together and settle out at the bottom of the fermenter. This can have an impact on beer clarity.

Above all, the question of what kind of yeast is perfect for your brew will be dependent on how it affects the beer you’re making. So when choosing a yeast, think about the flavor characteristics you’re going for in your beer, including residual sweetness and mouthfeel, and choose the best yeast that fits those parameters.
In part two of this post, I’ll share many of the different yeast strains available to the homebrewer and share some style suggestions for each one.
Do you have some favorite yeast strains? How do you choose the perfect yeast for your homebrews?
———————————–
Read Part 2 >>
———————————–
David Ackley is a beer writer, brewer, and self-described “craft beer crusader.” He holds a General Certificate in Brewing from the Institute of Brewing and Distilling and is founder and editor of the Local Beer Blog.

Cloning Ithaca Beer Co.'s Flower Power-Pt. 5: Bottling & Kegging

homebrew side by side taste testWhen we left off with the Flower Power clone, I had just finished dealing with an especially troublesome blow-off situation. Fermentation was so vigorous that it was pushing hop material into the blow-off tube and causing it to literally blow off the carboy. With that issue resolved, fermentation continued without a hitch.
Last week I dry-hopped the beer with a big dose of American hops: Simcoe, Amarillo, and Centennial. A little taste test at the time gave me high hopes for this beer!
When I dry-hopped the beer, I took a gravity sample. I was a little surprised to find the beer at 1.014, five gravity points below the estimated final gravity! It’s not a big deal, it just means that the beer will be about 8% ABV instead of 7.5%. I think it’s safe to call this IPA a double!
You may have noticed I never did a secondary fermentation with this batch. The reason? Simply because I’m out of fermenters! Between the cider and the mead I’ve got going, I’m all out! We’ll see if skipping a secondary fermentation has any negative impacts (I’m guessing it won’t).
So after about five days of dry-hopping, I decided to go ahead and package the beer.
Since I’d like to enjoy some of the beer on draft, I decided to keg half of the batch in my three-gallon keg and bottle the rest. It creates a little extra work to both keg and bottle, but now I’ll be able to send some bottles to friends and family.
Here’s the step-by-step for both bottling and kegging a batch of beer:

  1. Clean all bottles, equipment, caps, and keg. It’s a lot of cleaning, but it’s worth it. You may want to review instructions for cleaning and sanitizing a keg.
  2. Sanitize all bottles, equipment, caps, and keg.
  3. Prepare priming sugar for the bottles. I used a brewing calculator to calculate how much corn sugar to use for 2.5 gallons of beer and a digital scale to measure it out.
  4. homebrew kettleFill keg. The trick here is to have the bottling bucket cleaned, sanitized, and ready to go, so you can quickly move the tubing from the keg to the bottling bucket. (Note to self: buy one of these!)
  5. Fill bottling bucket, mixing in the priming sugar solution as beer fills the bucket.
  6. Fill and cap bottles.

 I took another little gravity sample and taste while filling. The hop flavor and aroma are huge with citrus and spice notes! This one’s going to be good!
Check back soon to get the side-by-side comparison between the Flower Power clone and the original!
—————————————————————–
Review the whole Flower Power clone brewing process below:

—————————————————————–
David Ackley is a beer writer, homebrewer, and self-described “craft beer crusader.” He holds a General Certificate in Brewing from the Institute of Brewing and Distilling and is founder of the Local Beer Blog.

Cloning Ithaca Beer Co.'s Flower Power-Pt. 4: Primary Fermentation Mishaps

Beer Fermenting With Blow OffThis is part 4 of cloning a Flower Power IPA from Ithaca Beer Co. In part one I discussed how I researched and went about developing the clone recipe. In part 2 I showed how I went about calculating some brewing water adjustments. In part three I went over how the brewing process went. Now, in part four I’ll go over how the yeast pitching went and how primary fermentation is doing.
———-
Primary fermentation is usually one of those “hurry up and wait” situations where you just watch the yeast chug along and the airlock bubble away. But that’s not always the case.
After pitching the yeast starter for my Flower Power clone, I watched as the krausen grew on the surface of the wort for about 24 hours. Then the airlock started its telltale blip, signaling that CO2 was leaving the fermenter. Fermentation temperature was in the mid to upper 60s and everything was looking great. But by the second day of fermentation, I started running into some problems.
This Flower Power clone is a relatively high gravity beer, with an original gravity of 1.075. That translates to the unfermented wort being about 18% sugar. About 48 hours into primary fermentation, the yeast started going nuts!
Upon checking the fermenter one afternoon, I found that the fermentation had blown the bung right off the fermenter and was slowly spewing yeasty goodness all over my fermentation chamber! At this point, it wasn’t anything I hadn’t seen before and wasn’t cause for much concern. Besides, the beer smelled amazing. So I cleaned up the fermenter, the bung, and the airlock, and rigged up a blow-off tube to handle the excessive krausen. Within minutes of doing so, the pressure inside the fermenter blew off the blow-off tube!
It took me a couple repetitions of cleaning and replacing the tube to finally figure it out, but what was happening was that the krausen, being laden with a significant amount of hop material, was getting clogged on its way out of the fermenter. Pressure inside the fermenter would build until the bung would pop right out.
Shop Beer Recipe Kits
I attempted an alternative to the blow-off tube: wetting a paper towel with sanitizer solution and using a rubber band to secure it at the mouth of the fermenter. But this didn’t work either.
So how did I get past this messy situation?
I discovered that the airlock that I had been using had a small crosspiece at the base, a little “X” that provided a barrier for hop material to get stuck on and become clogged. What eventually worked was switching out the base with an airlock without the little X – you can see how this airlock has an open hole at the bottom. This opening gave the krausen and CO2 unimpeded flow out of the fermenter.
This “crisis” averted, the Flower Power clone has gotten through the most vigorous stage of fermentation and continues to chug away at about 68°F. And just from the whiffs I got while changing out the blow-off tube, I’m very excited about this beer. Stay tuned!
—————————————————————–
Review the whole Flower Power clone brewing process below:

—————————————————————–
David Ackley is a beer writer, homebrewer, and self-described “craft beer crusader.” He holds a General Certificate in Brewing from the Institute of Brewing and Distilling and is founder of the Local Beer Blog.

Cloning Ithaca Beer Co.’s Flower Power – Pt. 3: Brew Day

Brewing Flower Power Clone Beer RecipeAfter developing a recipe and experimented with brewing water adjustments for this beer, the actual brewing of the Ithaca Beer Co. Flower Power clone beer recipe was put on hold for a couple weeks while I was out of town. I finally got around to brewing the IPA last weekend and boy am I excited about this beer! Brew day didn’t exactly go off without a hitch, but there weren’t any major issues that should cause major problems down the line. Here’s how brew day went last weekend.

Preparing the Yeast Starter

The night before brewing I made a yeast starter with light DME and one pack of California ale yeast. I don’t have a stir plate or flask yet (they’re on the list!), so I just used a growler and gave the starter a swirl every few hours or so.

The Set Up

I usually try to get all my ingredients and gear together before I actually start brewing. This helps eliminate the multitasking that can often result in a mistake.
First I assembled the ingredients: malt, hops, yeast starter, and water amendments. Then I get all the equipment set up, plus a stack of towels at the ready. I’ll usually turn on some music and have a snack on hand just in case. At least a few days in advance, I’ll check the propane tank to make sure there’s enough fuel for the brew. Did you know you can weigh the tank to estimate how much fuel you have left? I’ll share how to do that in a separate post.

Clean and Sanitize 

The next step before brewing the Flower Power clone recipe– and in many ways the most important – is to clean and sanitize the brewing equipment. I won’t go over this in detail, but if you need a refresher you can check out this post for tips.

The Mash

I mashed my crushed grains in about 4.75 gallons of water. One thing I’ve been trying to dial in over the past few brews in my strike temperature – that is, the temperature of the water before it goes into the mash. Since the grain and the mash tun are often room temperature, you have to compensate by adding water that’s at least 10-15˚F hotter than your target mash temperature. Given that things are even colder in the winter, I aimed high. With a strike temperature of 180˚F, I was able to get the mash temperature right where I wanted it, in the mid-150s. You can use a calculator such as this one to estimate your strike temperature.
Here’s where I ran into a little problem – despite my efforts to get organized before brewing, after 60 minutes I realized I’d forgotten to add the honey malt! Doh! Luckily it’s not a big mistake. The honey malt is in the clone recipe mostly for flavor and color, and in theory the sugars should only take 30 minutes to convert. So I just mixed in the honey malt and added 30 minutes to the mash time. With the extra time added to the mash, I probably ended up with even better efficiency than I would have otherwise!

The Sparge  Shop Barley Crusher

I find I’m consistently low on the amount of sparge water I need. My calculations said 4-4.5 gallons would do the trick, but between grain absorption and volume loss in the mash tun, I was about a gallon short of my pre-boil volume. I just quickly heated up another gallon of water and made a note to adjust my calculations for next time.
At the end of the sparge I found I had six gallons of wort with a preboil gravity of 1.068 – right on target!

The Boil 

I think of the boil as the start of the home stretch. All it takes is watching the clock to make sure the hops get in on time. The four hop additions for this Flower Power clone beer recipe smelled amazing – Simcoe at :60, Chinook at :20, Citra at :10, and Ahtanum and Centennial at :0. And we haven’t even touched the dry hops yet!
My post-boil gravity was 1.075 – just a point shy of the estimated OG – but well within the margin of error. This beer should easily surpass 7% ABV.

The Chill & the Pitch

The colder ground water temperatures this time of year really help with cooling the wort quickly. My immersion wort chiller got the wort to pitching temperature in about 20 minutes. I pitched the yeast starter and now the beer is fermenting happily in the fermentation chamber!
Stay tuned to see how this Flower Power clone beer recipe turns out!
—————————————————————–
Review the whole Flower Power clone brewing process below:

—————————————————————–
David Ackley is a beer writer, homebrewer, and self-described “craft beer crusader.” He holds a General Certificate in Brewing from the Institute of Brewing and Distilling and is founder of the Local Beer Blog.