Is There Something To Add To Stop A Fermentation?

Mad Scientist With Something To Add To Stop A Wine FermentationHello,

At times my wine will appear to have stopped fermentation, and then after bottling it will start up again causing a big mess. Is there something I can add to the wine that will ensure that fermentation has stopped?

Albert W.
—–

Dear Albert,

It sounds like you are experiencing a stuck fermentation. There are several wine making books that cover this topic in fair detail. One that I might suggest is First Steps In Winemaking.

A stuck fermentation is when the yeast stop consuming the sugars before the sugars are all gone. There are several reasons why this could be happening: lack of nutrient, lack of oxygen, too cool of temperature… For more information about these reasons you can read the following article, Top 10 Reasons For Fermentation Failure.

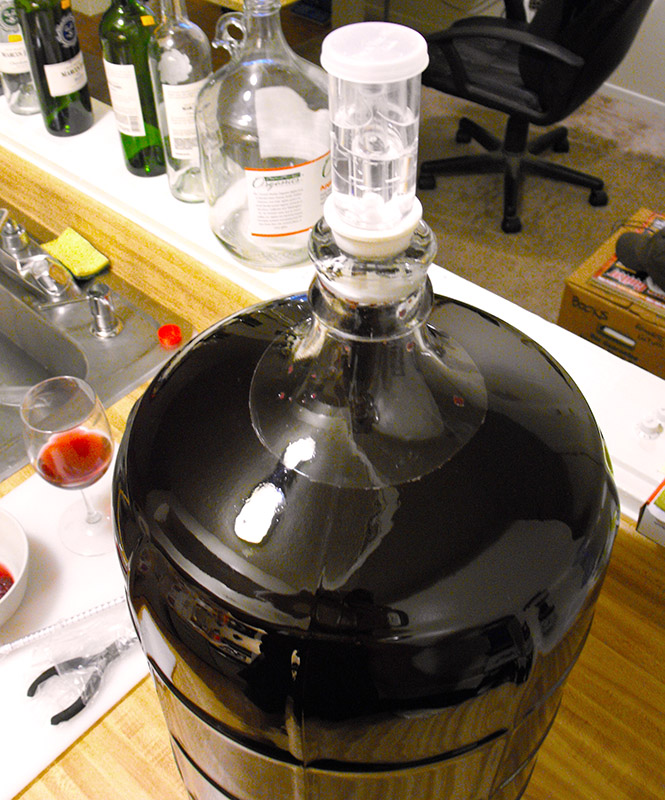
A stuck fermentation can start up again if the conditions change. In your case, just the simple exposure to air that inadvertently happens during the bottling process could be enough to start the wine fermenting again.

Unfortunately, there are no wine making products that guarantee a complete stop of a fermentation or a re-fermentation. What has to happen, is the fermentation needs to fully complete before bottling. The big question is, “How do you know when the wine’s done fermenting”?

Shop Hydrometers
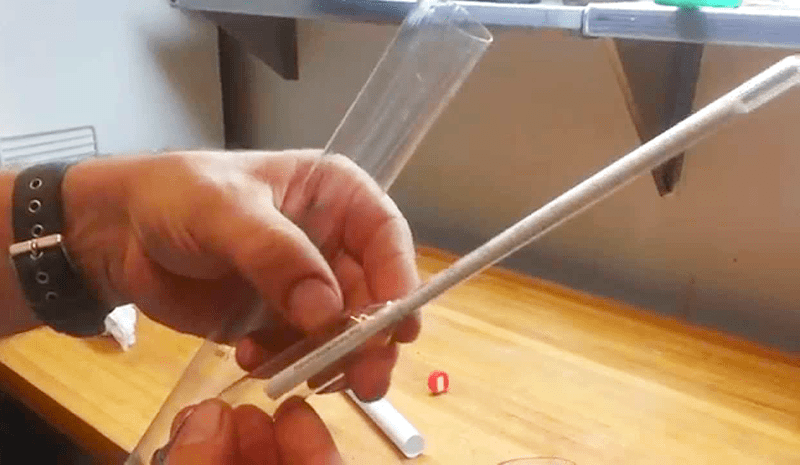
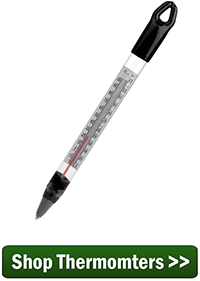
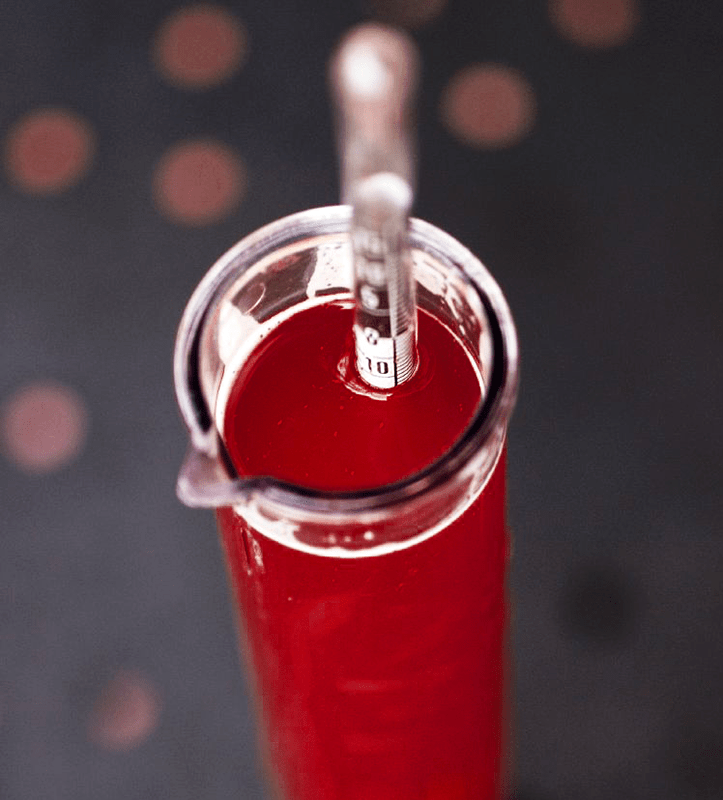
One simple way is to take a reading with a wine hydrometer. The hydrometer is a simple glass instrument that can instantly tell you how much sugar, if any, is in your wine or must. Using the hydrometer is simple. You take a reading by observing how high or low the hydrometer floats in the wine. By taking a reading before bottling and confirming no sugars are present, you can bottle your wine knowing that it will not ferment later on in the wine bottles.

As a side note, once you have verified that the fermentation has completed and the wine has had plenty of time for the yeast to settle out, you can add sugar for sweetening, but you must also add potassium sorbate at the same time. Potassium sorbate can keep a fermentation in check, but only if all of the yeast as been settled and removed from the wine first, and the wine looks visibly clear.

Happy Wine Making

Get More Potential Alcohol From Sugar

Get More Potential AlcoholHow do I get more potential alcohol alcohol on my wine hydrometer. I want to get the level up to 10 or 11% when making a dry wine without adding sugar?

Name: Jay K.
State: Arkansas
—–
Hello Jay,

Thanks for the great questions about how to get more potential alcohol. This question covers some areas of confusion for many home winemakers. Let’s see if we can clear it up a little.

Let me start off by making something clear. The only way to raise the potential alcohol reading of a wine is to add more sugar to it. The potential alcohol scale on your wine hydrometer is directly related to the concentration of sugar within it. Add more sugar to the wine must, the potential alcohol reading goes up. The potential alcohol reading on your wine hydrometer comes from sugar, nothing else, so you add more sugar to get more potential alcohol.

The reason for this is very simple. When a wine is fermenting what’s happening? The wine yeast are consuming the sugars and converting them into both CO2 gas (carbon dioxide) and alcohol. Almost exactly half the sugar Shop Hydrometersturn into CO2 the other half turns in alcohol. The more sugar that is available to the wine yeast the more alcohol you will end up with. So if you put add 2 pounds of sugar and the wine yeast ferment it, you will have added 1 pound of alcohol to the wine.

The above is true until the wine yeast have reached their limits of alcohol tolerance. Wine yeast can only ferment so much alcohol. Once the fermentation reaches a high enough level of alcohol, the wine yeast will have difficulty fermenting any further. What this levels “is” depends on several factors: including the strain of wine yeast and the environmental conditions of the fermentation such as temperature, nutrients, etc.

The sugar we are talking about to get more potential alcohol does not have to be cane sugar. It doesn’t even have to be a granulated or powdered sugar. It could come in the form of grape concentrate, honey, apple juice… the list is endless. The sugars from all these things will also raise the potential alcohol level on your wine hydrometer when added to a wine must. Just remember potential alcohol comes from sugar.

So to sum up what you should do to get more potential alcohol:Shop Wine Yeast

  1. Pick out some form of sugar (nothing wrong with using cane sugar);
  2. Dissolve the sugar into the wine must until the potential alcohol scale on your wine hydrometer reads a  reasonable level. (11% to 13% will work fine);
  3. Let it ferment with an actual domesticated wine yeast.

Happy Winemaking,
Ed Kraus
—–
Ed Kraus is a 3rd generation home brewer/winemaker and has been an owner of E. C. Kraus since 1999. He has been helping individuals make better wine and beer for over 25 years.

Why Does My Wine Taste Better The Next Day?

Wine Poured From A Caraf
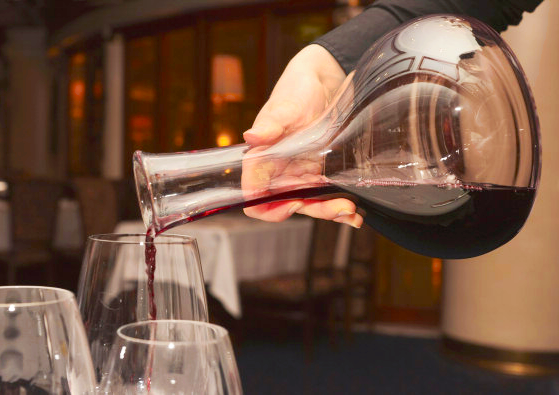
I really enjoy the wine making information in your newsletters. I bottled my first wine, a California Merlot, last May. It aged in 6.5 L carboys and had 8 months of French oak chips. I racked it twice. It is still a bit young, but interestingly, if I decant the wine and drink it 24 hours later, it is a much better wine. Can you speculate as to why does my wine taste better the next day?

James — MI
—–
Hello James,

The wine taste better the next day because you are allowing time for it to breathe. What is really going on when a wine breathes is it is being introduced to fresh air again, something that it hasn’t had contact with for quite some time. By pulling the cork and simply letting the wine bottle stand or by pouring the wine into a carafe, the air will start a mild oxidative process that will soften the rough edges of the wine’s tannins.

It also allows time for any odd gasses to escape that may have developed during the aging or maturation process. Allowing a wine to breathe has also been known to intensify both the flavor and bouquet of a wine — something that can be a problem for wines that have not been fully aged, however this is not true in every case.

While allowing time for the wine to breathe can be a benefit for some, for many it will have no benefit at all, and for others it may even bring damage, particularly with older wines whose flavor structure has been known to collapse very shortly after decanting.

The wines that are most likely to benefit from breathing are younger, heavy reds that have not yet had time to take complete advantage of the aging process. And, it just so happens that young, red wines is what’s readily available to the home winemaker.

How long you should let the wine breath is another issue. Usually we are talking minutes not hours. More than likely 60 minutes would have been just as good as waiting for the next day to drink your homemade Merlot. As a general rule-of-thumb the younger the wine the more time it may need to take full advantage of breathing, but to say a wine needs until the next day to breathe is excessive from any perspective. Think in terms of a few minutes with a probability of improvement on up to an hour.

Shop Wine Making KitsWith all this being said, unless you have previous experience with decanting a specific wine, giving it time to breath can be a bit of a crap shoot. In the case of your Merlot, you have specific experience with it, so I would not hesitate to let it breathe for 30 minutes and see what you think.

In the case of an unfamiliar wine: if it is white, allowing time for it to breathe is pointless; if it has been aged more than 4 years, not recommended; and if it has been aged 8 or more years, it could be risky in the sense that the wine’s structure could collapse altogether giving the wine a flabby character. Stick with the red wines that are heavy in tannins and short on aging.

James, I hope this answers your question as to why your wine tastes better the next day. You are not the first to bring this up.

Happy Winemaking,
Ed Kraus
—–
Ed Kraus is a 3rd generation home brewer/winemaker and has been an owner of E. C. Kraus since 1999. He has been helping individuals make better wine and beer for over 25 years.

A Simple Guide to How Oak Chips Are Made

Stacked Staves Is Just Part Of How Oak Chips Are Made
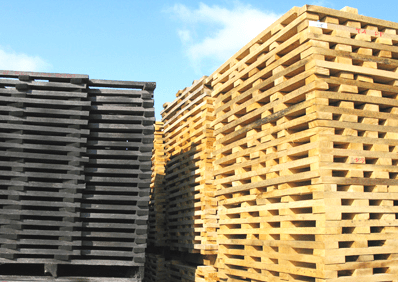
A friend asked me what is the difference between wine oak chips and untreated oak fire logs. Can you explain

Arie E. — DE
—–
Hello Arie,

Thanks for such a great question. A lot of times home winemakers assume that the toasted oak chips they purchase are just any ole oak chips. This sometimes leads to the winemaker’s bold idea of making their own. While it is possible to make your own oak chips, it isn’t possible to do it successfully without some basic understanding of how oak chips are made. There are some important subtleties involved that will greatly influence how the oak chips will affect your wine.

The most basic of requirements is to use the right type of wood. Not any oak will do. It needs to be white oak, and even then only certain strains of white oak are sought after by barrel and oak chip producers. They use strains of white oak with an extremely tight grain. This keeps the tannin extraction into the wine under control while other flavor qualities are leached from the wood.

Once you have the right wood, it then needs to be aged. Normally, the wood is cut into strips called staves and cross stacked out in the weather for 1 to 3 years. This does two things: 1) it dries the wood out; 2) it leaches out the unwanted sap and other impurities. The cross stacks are re-stacked from time to time. This is to even out the effects of the weathering.

Shop Toasted Oak ChipsThis is the same process that is used to prepare wood for the production of oak wine barrels. In fact, many times toasted oak chips are made from the scraps of wood that barrel coopers cut off when making the barrel head, shaping staves, and such.

Now that you have the right type of wood that has been aged, it is now time to toast it. Toasting the wood is an import part of how oak chips are made. This is when the sweet flavors of the wood are risen to the surface through heat.

The heat turns the various carbohydrates that are in the wood into sugars. It also raises and concentrates flavor compounds such as vanillin to the surface so they can be easily extracted into the wine. These flavors compounds combined with wood sugars and tannin are what create the oak character in the wine.

The flavors that oak chips can add to a wine vary based on how the toasting is done. The temperatures and the length of time used are important in the creation of the oak chips’ flavor profile. As the temperature rises and time increases, different flavors are produced: sweet / vanilla / coconut / butterscotch / toast / clove / almond / burnt. The temperature range is typically from 320°F. to 420°F., but the length of time is just as important.

As you can see, there are a lot of specifics going on. It’s not like throwing a log on the fire or anything like that. It’s about controlling the specific. And, even then there is still a lot of room for variations.

Arie, this is the basics of how oak chips are made. Keep in mind this is just the basics. Over the decades a lot more science and precision has gone into the production of oak barrels and oak chips as well.

Happy Winemaking,
Ed Kraus
—–
Ed Kraus is a 3rd generation home brewer/winemaker and has been an owner of E. C. Kraus since 1999. He has been helping individuals make better wine and beer for over 25 years.

My Wine’s Starting Specific Gravity Is Too High

Starting Specific Gravity Is Too HighHi, I followed a recipe for blueberry wine that called for 15 pounds of sugar and 20 pounds of frozen blueberries for a 6 gallon batch. I just measured it with my wine hydrometer and got a reading of 1.148 ! I know this starting specific gravity is too high. Is there anything I can do other than hope for the best ? I am new to wine making and have no idea ?

Marshall S. – IA
—–
Hello Marshall,

Well, that’s an interesting wine recipe. The starting specific gravity reading you got on your hydrometer, does make since with that much fruit and sugar being added. The bad news is that the odds of a fermentation even starting at that high of a specific gravity reading is very low. When the concentration of sugar gets too high, it starts to act as a preservative, keeping the yeast from fermenting.

The good news is that I think we can fix it. Simply put, your wine’s starting specific gravity is too high, and we need to think about how we can lower it.

Shop Hydrometer JarsIn reality, there are two concerns. The first one is the most obvious: too much sugar for the yeast to start fermenting. That’s what the specific gravity reading is telling – how much sugar. But there is also a concern that there may be too much blueberry – enough to make the wine overly tart and astringent. With that being said, here’s what you can do:

  • Dilute the wine must with water until you get a reading of 1.100. If you like, you can use a Pearson square to calculate how much water to add to get from 1.148 to 1.100. (Water has a S.G. of 1.000) There will still be plenty of blueberry flavor to go around. Our blueberry wine recipe only calls for 13 lbs. to 5 gallons, so don’t worry about weakening the wine’s flavor too much. And besides, you really don’t have much choice when your wine’s starting specific gravity is too high. The yeast aren’t even beginning to think about fermenting with that much sugar.
  • Take an acid reading with an acid test kit. This will tell you if the blueberries are still providing enough tartness to make the resulting wine taste right. The directions in the acid test kit will tell you what range you are shooting for. My guess if that you will need to add a little Acid Blend after diluting with water to bring the acidity up a bit. But, if the acid level is still too high, Shop Acid Test Kityou will want to dilute the wine must with even more water. Just try to keep your wine’s starting specific gravity above 1.075.
  • Once you have the sugar level and acidity in a decent range, it’s all smooth sailing. If you haven’t added add yeast nutrient at this point, I most certainly would, now. The same goes for pectic enzyme, and wine tannin. If you got the ingredients from us, you will find recommend dosages on the side of each container.

If you have already added the wine yeast you can still do all of the above. The yeast will be fine. If you have not, be sure to use and actual wine yeast. Don’t add a bread yeast.

Once you’ve got the specific gravity and acidity level ironed out, you will continue on like you normally would with any winemaking process. Here’s an wine making infographic that lays out the basic steps for you.

Hope this information helps you out. I urge you to do the above steps. Don’t dump it out. Nothing you have done or will do in the above steps will compromisedShop Wine Making Kits this wine in any way, so it will be well worth the effort. Believe me, you are not that only one that’s ran into this problem. Many home winemaker’s have gotten their wine’s starting specific gravity too high. Just take things a step at a time and your wine will be out of the woods.

I would like to welcome you to take a look at our wine recipes that are free for anyone to use. These a solid, time-tested wine recipes that will keep you out of trouble in your future wine making adventures.

Happy Wine Making,
Ed Kraus
—–
Ed Kraus is a 3rd generation home brewer/winemaker and has been an owner of E. C. Kraus since 1999. He has been helping individuals make better wine and beer for over 25 years.

Darn It! My Wine Smells Like Rotten Eggs

Homemade WineFor the first time ever I ordered juice concentrate, your merlot and blackberry, to try making a large batch of my favorite flavors. Well, I followed the directions to the letter and it all fermented nicely in the primary. After 5 days racked it to the secondary, 6 gallon glass carboy but for the first time left a little head space of a couple inches figuring that it would be ok since it it was still bubbling a little. It has been two weeks and I racked it again to get it off the sediment and OMG it smells of sulfur, or rotten eggs! Once the wine was in my plastic bucket the smell dissipated and the wine tasted ok but today I checked it and there is still a smell. What did I do wrong? I’ve heard of adding egg white to try to take away the smell…. what can I do? I really hope I don’t have to dump it. HELP!

Name: JoAnn S.
State: WI
—–
Hello JoAnn,

All fermentations put off some sulfur or rotten egg smells. Some much more than others. When a wine smells like rotten eggs, what you are actually smelling is hydrogen sulfide. There are many of reasons why one fermentation might produce more hydrogen sulfite than others, but here are the big four:

  1. Fermenting With Wild Yeast: Shop Wine Yeast
    In your case, we can rule this out because you are using a wine ingredient kit that comes with a domesticated wine yeast. But if you were relying on wild yeast to do your bidding, this would most likely be the reason why your wine smells like rotten eggs. Some wild yeast can produce tremendous amounts of hydrogen sulfide.
  1. Lack Of Nutrients:
    Not having enough nutrients in the fermentation is another cause of high hydrogen sulfide output. But again, you are using a wine ingredient kit that has been nutritionally balanced. The yeast nutrient is at its ideal level in the wine concentrate, so we can also rule this out for your particular situation.
  1. Fermenting At Too Warm Of Temperature:
    Fermenting your wine too warm is another common reason for a fermentation to produce and abundance of hydrogen sulfide. Temperatures that are above 75°F. are suspect, and anything over 80°F. are likely to be problematic to some degree.
  1. Overworked Yeast: Shop Yeast Nutrients
    This happens when there is too little wine yeast to do too much job. There have been many times when a winemaker will accidentally kill a significant portion of the wine yeast when rehydrating it in warm water. If the wine yeast is put in rehydrating water that is too hot, or the yeast is left in the water for too long, more yeast cells will be killed than anticipated by the wine yeast producer. This sets the stage for a fermentation with too little yeast, and in turn, produces too much hydrogen sulfide.

The Overall Theme:
It is important to point out that all the above reasons relate to allowing the yeast to ferment under stress. When a wine smells like rotten eggs, start look at thing that might be putting fermentation in a stressful situation.

Having a wild yeast that is fermenting out of its normal element is stressful; having any yeast ferment with a shortage of nutrients, or ferment in a temperature range that is uncomfortable to it is stressful; and having a little bit of wine yeastShop Potassium Bisulfite doing a lot of work are all stressful things that will lead to high hydrogen sulfide production. Having said this, the whole idea is to keep the wine yeast happy and you will keep the hydrogen sulfide production down.

What To Do Now:

— Give It Time: A lot of the hydrogen sulfide will release and dissipate on its own. It sounds like this may be the case with your wine currently. And, more will dissipate when you bottle the wine.

— Add Sufites: Also, adding a dose of sulfite to the wine will help to drive out the hydrogen sulfide. You can add the sulfite in the form of Campden tablets, sodium metabisulfite or potassium metabisulfite. Just following the directions that are on the package and let the wine sit for a few days.

— Use Copper: If the wine still smells like rotten eggs, you can pour the wine through a copper scouring pad. When the wine comes into contact with copper a reaction will occur the encourages the hydrogen sulfide to release as fumes. The reaction will cause the copper to corrode, so your may need to use more than on copper pad.

Happy Winemaking,
Ed Kraus

—–
Ed Kraus is a 3rd generation home brewer/winemaker and has been an owner of E. C. Kraus since 1999. He has been helping individuals make better wine and beer for over 25 years.

My Homemade Wine Has A Sour-Bitter Taste

Wine Is Sour BitterI have made two batches of wine from wild grapes here in WI. The first one was harsh at first but aged about a year and it turned out very good and smooth. The second batch has been bottled now for about a year and is still sour, bitter and hard to drink. Wondering what I could do with it besides just sweetening it – don’t care much for sweet wine. I am about ready to pick some for the next vintage and am trying to figure out what I can do ahead of time to get it to turn out better. I read some in the blogs about adding acid blend before you bottle if it is too blah but what can be done if I sample before I bottle and it is way too harsh?

Name: Mike S.
State: Wisconsin
—–
Hello Mike,

There are two major reasons a homemade wine will have a sour or bitter taste:

  • There is too much acid in the wine Shop Potassium Bisulfite
    If your homemade wine has a sour taste it could simply be from the fact that the fruit used to make the wine was too tart. In other words, the wine has too much fruit acid from the fruit, itself. Also, a homemade wine can have a sour taste if too much fruit acid was added to the wine must by way of acid blend. Regardless, if your wine has a sour taste for this reason there are corrective steps you can take to make sure that this does not happen with the batch of wine your are getting ready to make.  I would suggest taking a look at the article on our website, Getting A Handle On Wine Acidity. This will fill you in on what to do. As for your current batch of wine, there are some things your can do to lower the acidity level.
  • The wine is turning to vinegar
    If your homemade wine has a sour taste it could also be caused by vinegar bacteria (acetobacter). The bacteria infects the wine an slowly begins to turn it to vinegar. There are two ways to distinguish vinegar sour from just plain too tart. The first being, the wine will become more sour as time goes buy. Shop Acid Reducing CrystalsThe second way is by smell. Having a homemade wine with a sour taste from fruit acid will have no smell from this, but a wine with a bacterial infection will also have a sour smell. The number one reason for a wine to be infected with acetobacter is sanitation. If you are not using sanitizers to clean your wine making equipment and wine bottles, then this could definitely be the cause. If you are not using sulfites such as either: sodium metabisulfite, potassium metabisulfite or Campden tablets directly in the wine, then this could be the cause. An article on our web site that will put you on the right track is The Many Uses Of Sodium Bisulfite.

Bitter is caused by having too much tannin in the wine. Tannin is the dry, woody tasting stuff that can be experience when chewing on a grape skin. If the grapes are over processed or chopped, such as using a blender, etc., too much tannin may be coming out of the grapes and into the wine must. This will give your homemade wine a bitter taste. It is important that you only crush the grapes. All you are looking to do is burst the grape skins. Anything more than this is overkill.

It is possible to reduce the bitterness of a wine. Treating the wineShop Bentonite with bentonite will help to drop out some of the tannin as a sediment.

How long you keep the skins in the fermentation can make a difference in bitterness, also. A reasonable amount of time would be 3 to 5 days. If you left the skins in the fermentation longer than this, than you may want to adjust what you do this season.

Mike, I hope this info helps you out for this year.

Happy Winemaking,
Ed Kraus
—–
Ed Kraus is a 3rd generation home brewer/winemaker and has been an owner of E. C. Kraus since 1999. He has been helping individuals make better wine and beer for over 25 years.

What Size Corks Should I Get For Bottling My Wine?

Different Size Corks For Bottling WineIf you’re getting ready to buy corks to bottle your wine you may be wondering which size corks you should get. We offer four different sizes of wine cork stopper. They are sizes: #7, #8, #9 and #10. These numbers refer to the diameter of the cork. The higher the number, the larger the diameter of the cork.

The opening of a standard, 750 ml wine bottle is 3/4 of an inch. If you have a wine bottle corker you will want to purchase either the size #8 or size #9 corks. The diameter of these corks are 7/8″ and 15/16″, respectively. Size #9 corks is what the commercial wineries use. Either will require a wine bottle corker to press them into the bottle.

Which size cork you get depends on the type of wine bottle corker you have. Any wine bottle corker on the market can put in the size #8 wine cork, however some wine bottle corkers have trouble putting in a full-size #9 cork.Shop Wine Corks

If the corker was purchased from E. C. Kraus, you will be able to put in a size #9 or #8 cork just fine. If your corker was purchased from somewhere else then some caution will be required.

Some wine bottle corks on the market use a funnel-design to compress the cork. The wine cork is shoved through a funnel into the opening of the wine bottle. For the most part, this design of corker will work okay for a size #8 cork, but if you want to put in a full-size #9 wine cork and get a tighter seal, using a funnel-style corker can be a problem. The larger cork can get pinched and frayed as it goes through the funnel.

All the wine bottle corkers we offer compresses the cork evenly, from Shop Wine Bottle Corkersall sides then plunges the cork into the barrel opening of the wine bottle. With this method of corking no damage will come to the cork, as it is not be contorted through a funnel opening.

We do not recommend using size #7 cork, but we do offer them for individuals who want to put their corks in by hand. This size wine cork is small enough in diameter to be put in without a wine bottle corker. The downside is that they do not seal the wine bottle very well. In fact, if you lay the wine bottle on its side, there is a fair change that the #7 wine cork will seep some wine. For this reason you should store wine bottle upright if using this size of wine cork.

Size #10 corks are for larger size bottles. While many larger bottle still have the same 3/4 inch opening that the 750 ml have, some larger size wine bottles have larger openings that will require this larger size cork.
—–
Ed Kraus is a 3rd generation home brewer/winemaker and has been an owner of E. C. Kraus since 1999. He has been helping individuals make better wine and beer for over 25 years.

There’s A Yeasty Smell In My Wine. Should I Dump It!?

Noticing Yeasty Smell In WineI’m still learning this process but haven’t had this happen. Got 3 gallons of Muscadine wine I was gonna bottle up. When opened up it has a very strong “yeasty” smell in the wine. Made this a couple times and never had this happen. Only thing I did different was use a different wine yeast. (Montrachet instead of lavlin 71b 1122.) I may have forgotten to rack the wine after it had been placed in the secondary fermenter. Either forgot to write it in log or didn’t do it. Seems I read somewhere that could cause this issue. Anyway, should I bottle this or dump it and start a new batch when the Muscadines ripen this summer. Thanks for the advice……..

Name: Bill B
State: SC
—–
Hello Bill,

There is absolutely no reason to dump any wine because it has a yeasty smell. This is an issue that comes about from time to time that is easily overcome.Shop Wine Yeast

It is true that different wine yeast have different amounts of yeast odors, but the yeast smell also increases the more the yeast become stressed. If the fermentation is done in an environment that does not make the wine yeast happy, you will get more of this odor.

Examples causing stress are:

  • Fermenting at too warm of a temperature
  • Fermenting with not enough nutrients in the wine must
  • Fermenting with too little yeast to perform the job at hand

The last one typically happens with old wine yeast is used, or a significant portion of the yeast cells are killed in the rehydration process.

Most of the time this odor will go away on it’s own throughout the natural course of the winemaking process. Racking the wine is one of the times that this odor is able to release from the wine and dissipate. You stated that you are not sure if you racked the wine, so this could be all that’s wrong with the wine.

Shop Potassium BisulfiteAnother normal activity in the winemaking process that releases this odor is adding sulfites. This would either be Campden tablets, potassium metabisulfite or sodium metabisulfite. If you do not ever add any of these then this can contribute to the yeasty smell in the wine.

A sulfite should always be added to a wine anyway to protect it from spoilage and oxidation, but doing so also drives out unwanted volatile gases that are in the wine from the fermentation – such as the ones you are smelling. If you haven’t done so already, the simple task of adding a standard dose of sulfites and waiting a few days may be all that is needed.

Since you are not sure if you racked your wine or not, I’m guess that all you need to do is rack the wine and add sulfites. Hope this should get rid of the yeasty smell in your wine. In not, repeat the process. Rack the wine in a splashing manner and then add sulfites again.

If you find that the yeast smell in the wine is not leaving that you may want to take a look at what to do about treating wine with a hydrogen sulfite issue.Shop Mini Jet Wine Filter

Just remember next time to keep your wine yeast happy, regardless of the type used; rack your wine sufficiently; and always use sulfites in your wine. Do these things and you should not have this problem again.

Happy Winemaking,
Ed Kraus
—–
Ed Kraus is a 3rd generation home brewer/winemaker and has been an owner of E. C. Kraus since 1999. He has been helping individuals make better wine and beer for over 25 years.

Making Wine In Cold Weather

Making Wine In Cold WeatherI live in Louisiana in the south. Is it too late to make wine? Is there a problem making wine in cold weather? I have a lot of fruit left from the summer.

Mildred M. — LA
—–
Hello Mildred,

You can make wine all throughout the year without any problems. The only real issue is that you need to control your fermentation temperature. For a wine fermentation to go as it should, the temperature range needs to be between 70° and 75°F. If you get out of this temperature range, issues can arise, but beyond this, there is nothing wrong with making wine in cold weather.

If the temperature gets below 70° the wine yeast will start to go dormant. They can slow down to the point of not being active at all. This is known as a stuck fermentation. Or, the wine yeast may not start up at all. Warm the fermentation up to 70°F., and you will start to see activity.

This temperature range is true for most wine yeast except for a few exceptions like Red Star Pasteur Blanc wine yeast which can ferment at cooler temperatures without stopping completely. However, it will ferment very slowly.Shop Thermometers

If the fermentation temperature starts to get over 75°F., then the wine yeast can start to produce funny off-flavors and aromas. The resulting wine will not have a clean taste.

Beyond these concerns, there is absolutely no reason why you shouldn’t be making wine in cold weather, even in the middle of winter. Just have a means of controlling the fermentation temperature.

If you are not sure that you can keep the fermentation in this range, you may want to look into tying an artificial source of heat. It needs to be a very gentle source of heat. Most items you find around the house such as heating blankets are too warm and will put the fermentation well over the 75°F. This is just as bad, if not worse, as having the fermentation too cool.

If a fermentation is too cool there is no permanent damage done to the wine. It’s just not fermenting. Warm it up and the fermentation will start up again. But, if the fermentation becomes overly heated, youShop Heating Belt can encourage bacteria growth and the production of unwanted enzymes in the wine. Nothing harmful, but it will make the wine taste off or fowl, and it will be irreversible.

You may want to consider getting a thermometer for monitoring temperature when making wine in cold weather. Putting your hands on the side of the fermenter and guessing is not good enough. If you are making temperature adjustments you should have a fermentation thermometer of some type.

A heating belt is one way to warm up your fermentation a few degrees. This works good for cold basement situations or when fermenting in some cold corner of the house. It’s basically a strap that goes around the fermenter and plugs into an outlet. The only downfall is that there is no way to adjust its temperature of this belt.

Something else you can do when making wine in cold weather is to get a thermostat power switch. This is a power-interrupt thermostat with a temperature sensor. It plugs into an outlet and controls the power to a heating source – such as a heating blanket or the heating belt – base on the temperature to which it has been set.

Mildred, I say if you got the fruit, then go ahead and make the wine. The month doesn’t matter. Making wine in cold weather is easy to do. It’s simply a matter of taking control of the fermentation’s temperature.

Happy Wine Making,
Ed Kraus
—–
Ed Kraus is a 3rd generation home brewer/winemaker and has been an owner of E. C. Kraus since 1999. He has been helping individuals make better wine and beer for over 25 years.